Things You'll Need
Turkey baster
Bucket
Utility knife
Rag
Safety glasses
Drill
1/4-inch drill bit
Reciprocating saw
Pry bar
Level
Wood shims
1-inch rust-resistant screws
Strainer assembly
Rubber compression gasket

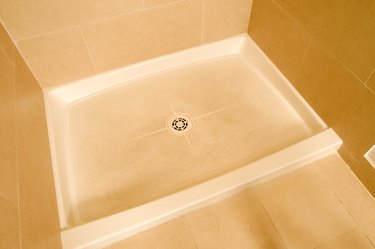
Mobile home showers often have a fiberglass base that attaches to the plywood subfloor and floor drain. Over time, the pan can become damaged or cracked or simply appear outdated, requiring replacement. Installing a new mobile home shower pan is almost identical to installing the shower pan in a traditional home, except that homeowners can access the plumbing pipes underneath a mobile home. Before you can install a new pan, you must remove the old one, which often requires minor wall demolition.
Removing the Old Shower Pan
Step 1
Insert a turkey baster in the drain hole of the shower pan and squeeze the top bulb to suck up any water still in the drain. Deposit the water into a bucket.
Video of the Day
Step 2
Cut along the outside of the shower pan, using a utility knife to break any caulk that holds it in place. Caulk typically resides along the front edge of the pan and up the walls to the point where the pan stops.
Step 3
Don safety glasses and install a 1/4-inch bit into a drill. Insert a rag into the center hole and place the tip of the bit into the drain hole on top of the black rubber gasket. Squeeze the trigger to drill down until the gasket begins to crumble. Repeat the process around the perimeter of the gasket to help loosen it.
Step 4
Remove the wall material around the top of the shower pan, if not already accomplished, using a reciprocating saw. Insert the saw blade by only ½ or 1 inch into the wall and cut down to the top of the shower pan. Pull away all of the wall material to expose the top edge of the shower pan.
Step 5
Locate the screws along the top edge of the pan that are screwed into wall studs. Remove each screw, using a power drill.
Step 6
Insert a pry bar under the front edge of the shower pan and push down on it to lift the pan up. Grasp the raised edge of the pan and pull it free from the enclosure.
Installing the New Shower Pan
Step 1
Place a level on the floor of the shower enclosure and check the entire floor area from front to back and side to side to make sure the floor is level. Install a wood shim under the level in any areas that are uneven. Secure the shims to the subfloor, using 1-inch rust-resistant screws at each end.
Step 2
Turn the new fiberglass shower pan on its side to install the strainer. Pick up the strainer and unscrew the upper and lower portions. Insert the upper portion through the top of the shower pan with the gasket facing the hole. Insert the lower portion up through the bottom of the shower pan with the gasket facing up. Screw the two sections together again and tighten the lower portion another half turn, using a wrench.
Step 3
Place the new fiberglass pan into the bottom of the shower and push it down. Insert 1-inch rust-resistant screws into the top edge of the pan over the location of each wooden wall stud, using a power drill. If no holes exist, or if they don't align with the old ones, drill new pilot holes, using a 1/4-inch bit, prior to inserting the screws.
Step 4
Insert a rubber round compression gasket into the top of the strainer. Tap the gasket down until it fits tightly into the opening. If needed, ask another person to push up on the pipe from underneath the mobile home.
Step 5
Proceed to install new fiberglass shower panel walls, tile or other wall material as desired.
Video of the Day