Things You'll Need
Work table
Vice
Terry cloth rag
Propane torch
Propane torch lighter
Rounded modeling tool
Single-edged knife or scissors

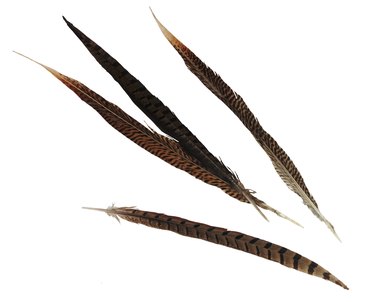
The graceful shape and delicate sheen of pheasant feathers adorn many rustic hats and seasonal crafts. If nature has not provided a feather with the perfect shape to complement your design, there are two shaping methods that you can use to achieve the look you desire. Taxidermists heat and apply a rounded modelling tool to shape feathers. Cold bending techniques, similar to the methods used to curl ribbons, are recommended by many hobbyists. They have the advantage of preserving the feather's smooth appearance and they do not run the risk of melting feather shafts.
Heat Process Feather Curling
Step 1
Secure the feather on the work table using the vice. Wrap the quill end with a terry cloth rag to prevent scarring. If the feathers are attached to the bird's body, mount the bird on its display stand.
Video of the Day
Step 2
Ignite the propane torch with the propane torch lighter. Place the torch upright on the work table, with the flame facing toward you.
Step 3
Grasp the rounded modeling tool by the handle. Use the propane torch to heat the rounded modeling end. The modeling tool should be warm enough to bend the feathers without melting the feather shaft.
Step 4
Run the rounded end of the warm modeling tool up and down the feather shaft. With your other hand, gently flex the feathers into the desired curved shape.
Step 5
Repeat Step 4, reheating the rounded end of the modeling tool until a permanent curve in the desired form is achieved.
Cold Process Feather Curling
Step 1
Stroke the pheasant feather with your fingers. Repeat this action several times. If you are satisfied with the amount of curl, discontinue the process. If you desire more curl, continue to Step 2.
Step 2
Pull firmly upward against the pheasant feather spine from the tip to the base using the dull edge of the knife or scissors. Move the blade about 2 inches at a time. This motion is similar to curling a ribbon with the back of a knife or a pair of scissors. Continue until you reach the other end of the feather.
Step 3
Repeat Step 2 until the desired amount of curl is achieved. If you are satisfied with the shape of the feather, stop here. If you desire to twist the shape of the curl, proceed to Step 4.
Step 4
Place the dull edge of the knife or scissors against one side of the pheasant feather spine. Place your thumb on the opposite side. Use your thumb and the dull knife edge to twist the feather in the desired direction. Begin at the quill end and work to the tip of the feather. Continue until you reach the other end of the feather. Work an inch or so at a time. When you have achieved the desired twist on this side of the side, repeat the process on the other side of the feather.
Tip
An experienced feather bender does not wear a protective glove when he is heat bending a pheasant feather. Since overheating the tool can ruin a feather, using bare skin to hold the metal helps avoid too high a temperature. Keep the rounded modeling iron in motion to avoid burning the feather shaft.
Rounded modeling tools are available from taxidermy and clay modeling supply houses.
Warning
Wear a cotton work glove on the hand that bends the feather until you know how to heat the rounded modeling tool without getting it too hot.
Video of the Day