Things You'll Need
Water
Pot
Hot plate
Glass
Spoon
Salt
Straw
Needle
String
Balloon
Marker
Newspaper
Typing paper
Flour
Polystyrene foam block
Scissors
Spray paint
Hot glue gun and glue sticks
Cardboard

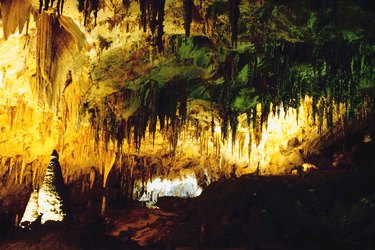
Many cave interiors contain beautiful crystals that sparkle when illuminated. Other caves are dark and dirty, with lots of crevasses where insects and small animals can hide. Whether the cave you want to recreate appears in a story or drama you read or is a figment of your imagination, you can fabricate the interior cave wall for a diorama, decorative scene or a stage setting. Inexpensive materials such as paper mache, polystyrene foam or plastic wrap can create lightweight cave scenery.
Step 1
Heat water in a pot on a hot plate. Stir salt into the water until no more salt will dissolve. Pour the hot water into a heat-resistant glass. Cut eight to 10 strings long enough to reach from the top of the glass to the bottom. Thread a string into the eye of a needle and tie a knot in the end of the string. Poke the needle through a straw crosswise and pull it through until the knot rests against the first side of the straw. Remove the needle, thread another string through it and stick it through crosswise in the same way, about an inch away from the first string. Repeat until all the strings are through and hang suspended from the side of the straw. Use more straw segments if necessary. Lay the straw across the top of the glass so the strings hang down in the water. Allow crystals to grow on the string. Add additional saline water to the glass to increase the size of the crystal stalactites. Your crystals should grow about one week.
Video of the Day
Step 2
Blow up a balloon the size you want your cave to be. Use a marker to draw the outline of your cave on the balloon, including a level line for the cave floor. Tear strips of newspaper and strips of typing paper. Mix one part flour with four parts water and a dash of salt to make paper mache glue.
Step 3
Dip a strip of newspaper into the glue and place it inside the cave outline you drew on the balloon. Smooth out any wrinkles or bubbles with your fingers. Dip another strip in the glue and place it next to the first strip. Continue to cover the cave outline you drew on the balloon until the balloon is covered. Cover the first layer of paper mache with a second layer. Let the paper mache cave fully dry.
Step 4
Scrape a bright white polystyrene foam block to create shiny crystals to cover the interior of your cave.
Step 5
Pop the balloon and peel it away from the paper mache. Cover the interior of the paper mache cave with a third layer of paper mache using the typing paper strips. Spray paint the interior of the cave with a dark glossy paint. Sprinkle the polystyrene foam crystals on the wet paint. Let the cave dry upside down.
Step 6
Trim the strings on your crystal stalactites. Hot glue the stalactites to the cave roof. Invert the cave and set it on top of a sheet of cardboard. Trace the outline of the cave on the cardboard.
Step 7
Cut out the cave outline. Use clumps of paper mache to create rocks and other structures on the cave floor. Spray the cardboard with paint and cover the wet paint with polystyrene foam crystals. Use the glue gun to glue the cardboard to the base of the cave. Paint the exterior of the cave with a flat dark color.
Video of the Day