Things You'll Need
Measuring tape
1/2-inch Plywood
Saw
Drill
Wood glue
Finish nails
Hammer
100-grit Sandpaper
Tack cloth
Mildew-resistant primer
Mildew-resistant paint
Paint brush

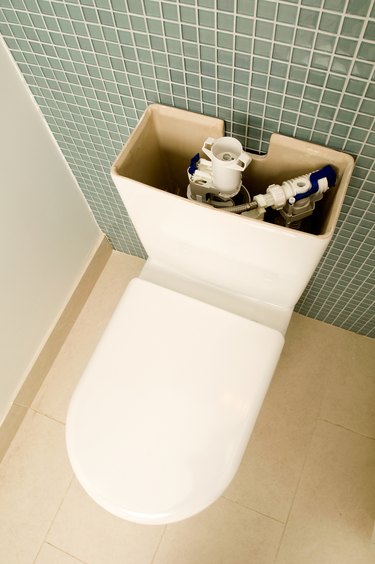
Most toilets are constructed of a durable porcelain material. The porcelain tank cover is a superior product but it may crack or break from extreme temperature changes or from a collision with a weighty object. Rather than purchasing a new toilet or scavenging junk yards for a replacement porcelain tank, you can make your own cover from wood. Primed and painted with mildew-resistant paint, the wooden toilet tank cover will adequately conceal the toilet tank's innards and provide years of use.
Step 1
Measure the width and length of the toilet tank. Add 3/4 inch to your width and length measurements to allow the new lid cover to sit comfortably on the tank. For example, if your toilet tank measures 19 inches by 8 inches, your final measurement size is 19 3/4 and 8 3/4 inches.
Video of the Day
Step 2
Cut the plywood according to your measurements. This is the top, or shelf, piece of the cover.
Step 3
Measure the two lengths of the plywood shelf you just cut. Cut two lengths of plywood according to that measurement and 1 1/2 inches wide. For example, if your plywood cover lengths are 19 3/4 inches, cut two narrow strips of plywood 19 3/4 inches long and 1 1/2 inches wide.
Step 4
Place the narrow strips onto the plywood shelf to create a lip. When installed, the lip will overlap the toilet tank and prevent the plywood shelf from sliding off the tank.
Step 5
Glue the narrow strips onto the plywood shelf. Predrill holes and nail in finishing nails to further secure the strips to the shelf.
Step 6
Measure the two widths of the plywood shelf. Cut two widths of plywood according to the measurement and 1 1/2 inches wide. For example, if your plywood cover widths are 8 1/4 inches, cut two narrow strips of plywood 8 1/4 inches long and 1 1/2 inches wide.
Step 7
Glue the narrow strips onto the plywood shelf next to the previous strips. This will create a lip that completely surrounds the edge of the plywood shelf, similar to the old porcelain cover with its smooth-top shelf and lip that held the cover in place over the tank. Predrill holes and nail in finishing nails to further secure the strips to the shelf.
Step 8
Test the completed tank cover by placing the cover over the tank. The cover should fit over the tank with a slight amount of room. The extra room allows the wood to expand and contract as the temperatures change throughout the year. A very tight wood cover would squeeze the porcelain tank, possibly causing cracks.
Step 9
Allow the tank cover wood glue connections to dry completely.
Step 10
Sand the wood with sandpaper, going in the direction of the grain and not against it. Wipe the sandpaper residue from the cover with a tack cloth.
Step 11
Paint mildew-resistant primer on the entire surface of the cover, inside and out. Allow to dry.
Step 12
Paint the entire cover with mildew-resistant paint. Allow to dry. Paint a second coat and allow to dry completely.
Tip
If your toilet tank is not perfectly rectangular but is irregularly shaped, build a larger wood cover that will squarely cover the tank. Take the largest measurement of the tank length or width and use that measurement for both sides of the cover. For example, if the irregular tank measures 15 inches by 9 inches by 13 inches by 9 inches, built a cover that measures 15 inches by 9 inches. Add the 3/4-inch measurement to allow for the placement of the narrow strips of plywood for the lip and to allow the cover to expand and contract naturally.
Video of the Day