Things You'll Need
Screwdriver
Wire cutters
Measuring tape
Saw
Electrical connector caps
4 #8-14 by 1 inch screws
2 #8-14 by 3/8 inch screws

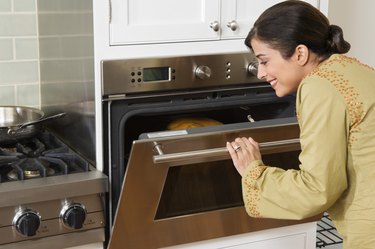
The KitchenAid Superba oven is a combination microwave and convection wall oven, though similar models with two convection ovens are sold under the "Architect 2" name. These ovens provide programmable electronic controls and a convection system for faster, more even cooking. Since the oven is recessed into the wall, it takes up less space in the kitchen. You can install your own KitchenAid Superba, but a few precautions are necessary.
Removing the Old Oven
Step 1
Turn the old oven's power supply off at the breaker box.
Video of the Day
Step 2
Use a screwdriver to remove the screws holding the door of the old oven in place. Pull the door off of the main oven frame. This may require some effort if the oven has been in the same place for a long time. Set the door aside.
Step 3
Remove the screws that hold the oven frame to the wall. Lift the old oven out of its position, sliding it forward. Use a pair of wire cutters to cut the wiring leading to the back of the oven, freeing it completely.
Installing the KitchenAid Superba
Step 1
Measure the opening in the wall to ensure that the 27- to 30-inch Kitchenaid Superba will fit correctly. The space must be at least 23 1/4 inches deep to accommodate the oven. If necessary, cut the opening larger.
Step 2
Remove the Superba door by opening it all the way, then rotating the latches into the unlocked position. Close the door all the way, then pull it off by lifting and pulling toward you simultaneously. Set the oven door aside.
Step 3
Feed the flexible cable conduit from the Superba through the opening in the junction box. Tighten the screws on the existing conduit connector to hold the cable in place.
Step 4
Determine whether your junction box uses a 3-wire cable or 4-wire cable. Connect the two black wires using an electrical wire connector. Connect the two red wires in the same way. If you have a 3-wire cable, connect the 2 white wires and the green wire using the same wire connector. If the box uses a 4-wire cable, untwist the white and green wires. Connect the two white wires together. Connect the green wire to the green or bare ground wire in the junction box. Replace the junction box cover.
Step 5
Lift the oven partially into the cabinet cutout, gripping it at the oven opening. Push the oven fully into the cabinet, applying pressure against the seal only. Fasten the KitchenAid Superba against the wall via the holes in the mounting rails using the #8-14 by 1 inch screws provided. Use the two #8-14 by 3/8 inch screws to fasten the oven vent securely.
Step 6
Replace the oven racks. Reattach the oven door by inserting the ends of the hinges into the hinge slots. Push the hinges in as far as possible, then open the door to drop the hinges into place. Rotate the hinge latches into the locked position and check the action of the door by opening and closing it several times. Turn the power to the oven back on. If the oven is correctly connected, the display should light up.
Tip
KitchenAid wall ovens come in several sizes.
Different models may have slightly different installation requirements.
Get help lifting and moving the oven to make the job go more quickly.
If the oven display does not light, check the electrical connection.
Warning
If your old oven uses gas, you can't replace it yourself.
Video of the Day