Things You'll Need
Shears sanitized with rubbing alcohol
Crushed perlite
Crushed vermiculite
Pot, 6-inch diameter, with drainage holes
Rooting hormone
Clean cardboard or wooden box
Spray bottle
Clear plastic sheeting or panel
Grow lights
Gardening thermometer
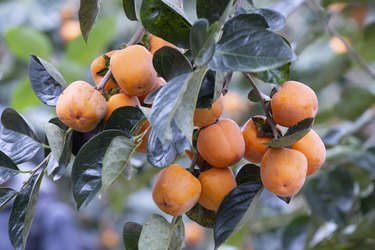
Persimmon refers to a family of trees that produce edible fruit ranging in color from yellow to red. The seeds of the fruit are viable, but they do not produce offspring identical to the parent tree. To propagate a persimmon and end up with an exact duplicate of the parent plant, you'll need to do so by taking cuttings. While root cuttings are the most viable, you may not have access to them. It's a little harder to do, but you can certainly propagate persimmon trees from stem cuttings. A high percentage of the persimmon cuttings will fail, so take lots of them for the best chance of success.
Step 1: Take the Persimmon Cuttings
Take the persimmon cuttings from young stems in late fall. This yields the best chance of success, as the stems are least likely to mold. Use sanitized shears to reduce the chance of infection. The cuttings should be about 6 inches long and 1/4-inch wide. Take 10 cuttings for every started persimmon you would like.
Video of the Day
Step 2: Prepare the Pots
Combine equal amounts of crushed perlite and vermiculite in one pot for each cutting you took, stopping 1 inch from the top. Mix the potting compounds evenly.
Step 3: Plant the Persimmon Cuttings
Dip the cut end of each persimmon stem in a rooting hormone and poke each in the center of an individual pot, about 2 inches deep in the perlite and vermiculite compound.
Step 4: Place the Pots Into a Box
Place the pots containing the persimmons in a cardboard or wooden box large enough to hold all of them. Use multiple boxes if necessary. The sides of the box should be approximately 18 inches high.
Step 5: Mist the Persimmon Cuttings
Fill a spray bottle with warm water, at least 90 degrees Fahrenheit, and mist the persimmon cuttings until dampened. Cover the box with clear plastic sheeting or paneling. The clear covering should keep moisture within the box.
Step 6: Set the Box of Cuttings Under Grow Lights
Position grow lights above the clear plastic covering, about 6 inches away, spacing them 8 inches apart. Keep the grow lights on for 12 hours a day. The temperature within the box should stay between 75 and 90 degrees Fahrenheit day and night. Place a thermometer inside the box to keep track of the temperature. Move the lights farther away if the temperature is too high; if it's too low, move them closer. Keep the box in a warm area indoors to help maintain the temperature.
Step 7: Keep the Cuttings Moist
Mist the persimmon cuttings once every 10 days with 90-degree water. Misting them more often might encourage mold growth. Remove any moldy persimmon cuttings from the box to prevent spreading spores to unaffected cuttings. Continue this process for about three months.
Step 8: Remove the Plastic
Remove the plastic covering from the persimmons for 30 minutes per day, and increase the frequency of misting to once every three days. Care for the persimmons in this manner for approximately three months. Increase the time without the plastic by 30 minutes every five days during these three months. Remove cuttings that die during the exposure process; the persimmons that remain successfully took root and survived the propagation process.
Step 9: Plant the Persimmons Outdoors
Take the remaining persimmons out of the box and plant them in the ground. Each species of persimmon requires different planting depth, plant spacing, fertilization and care. Speak with a representative at your local nursery for specific in-ground planting and care instructions.
Tip
All of the required supplies to propagate a persimmon tree from cuttings should be available from a local gardening store.
Video of the Day