Delight one and all by creating gorgeous, delicious and sophisticated-looking chocolate macarons. Two crisp, sweet and chewy chocolate and almond meringue shells are filled with an easy and rich dark chocolate ganache. Neither challenging nor time-consuming, this is a foolproof classic French macaron recipe that will easily yield perfect and professional chocolate macaron results every time!

Video of the Day
Things You'll Need
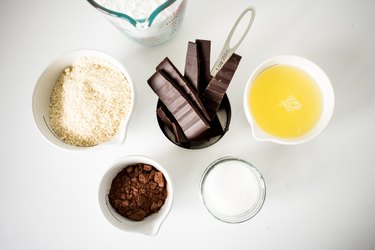
8.1 ounces / 230 grams powdered sugar
4.1 ounces / 115 grams ground almond meal
0.7 ounces / 20 grams Dutch-processed cocoa powder
5.1 ounces / 145 grams egg whites
2.5 ounces / 70 grams superfine sugar
4 ounces / 115 grams bittersweet dark chocolate, finely chopped
4 ounces / 115 milliliters heavy cream
2 tablespoons unsalted butter, at room temperature
Step 1: Measure and Weigh Ingredients
Macarons are notoriously precise. Measure and weigh out all of your ingredients beforehand for the best results.
Video of the Day
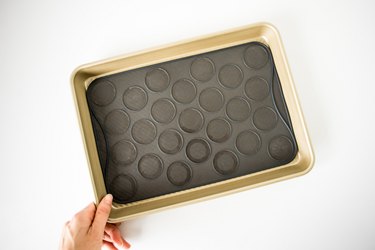
Step 2: Prepare the Baking Trays
Begin by lining three baking trays with either baking parchment or silicone macaron slip-mats, if accessible.
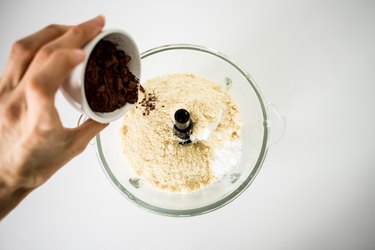
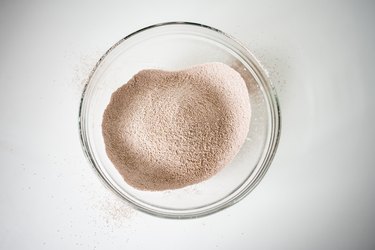
Step 3: Process the Dry Ingredients
Place the powdered sugar, almond meal and cocoa powder in the bowl of a food processor, and mix to form a finely textured crumb, roughly 1 minute. Set this mixture aside.
Step 4: Whisk the Egg Whites
In the bowl of a stand mixer fitted with the whisk attachment, or with a handheld electric whisk, whisk the egg whites on low speed until they become frothy.
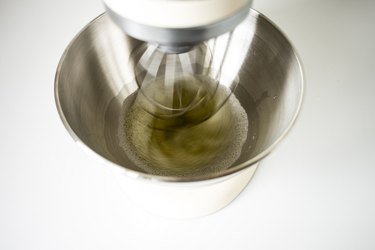
Once the egg whites have become frothy, increase the mixer speed to medium, and continue to combine until they start to form soft peaks, roughly 2 to 3 minutes.
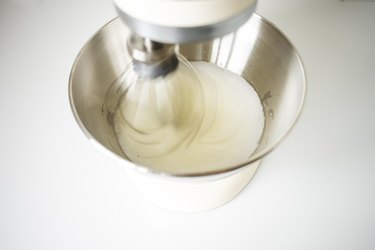
Step 5: Add the Sugar
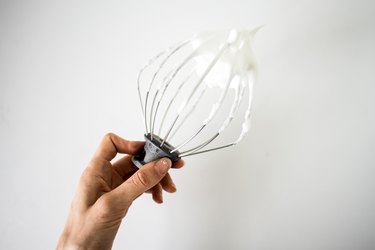
Add in the superfine sugar, one tablespoon at a time, and continue to mix on high speed until stiff, glossy, meringue-like peaks form, roughly 4 to 5 minutes. Set this meringue mixture aside.
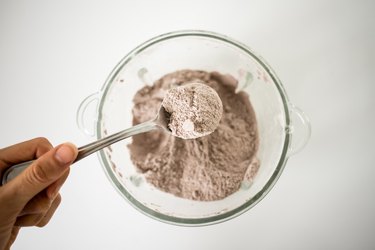
Step 6: Sift the Dry Ingredients
To ensure that no lumps remain, sift the dry ingredients from Step 3 into a large sized bowl.
Step 7: Fold the Mixtures Together
With a spatula, fold about 1/4 of the egg white mixture into the sifted dry ingredients to moisten and loosen it. Then, in two stages, gently fold in about half of the remaining whites at a time. When properly combined, the batter will be thick and leave a "ribbon trail" when gently stirred.
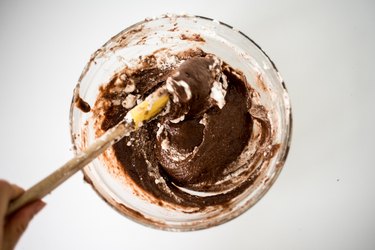
Tip
A useful way to test if the mixture is properly combined is if it flows like lava off the back of the spatula if you raise the spatula above the bowl.
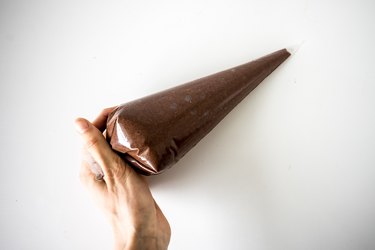
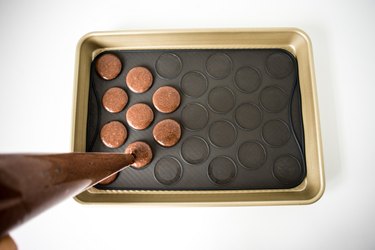
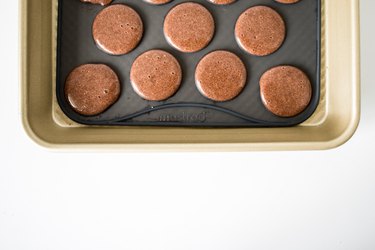
Step 8: Pipe Macaron-Shaped Circles
Spoon the mixture into a piping bag, twist the top and then cut a 1/2-inch / 1.3-centimeter incision in its tip. Alternatively, you could use a plastic zip-top bag with a corner cut out to pipe out the mixture.
Holding the piping bag vertically above one of the parchment-lined baking trays, or directly onto the silicone macaron slip-mat, pipe out 1 1/2-inch / 3.5-centimeter macaron-shaped rounds. Repeat with the remaining trays.
Step 9: Let the Macarons Sit
Let the macarons sit and rest on the trays to form a skin. This is a crucial process that will take 20 minutes to an hour, depending on the humidity in your kitchen.
Tip
The skin will be formed when you can gingerly touch the tops of the macarons without having batter stick to your finger.
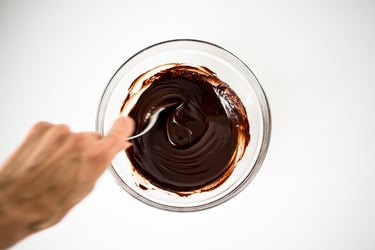
Step 10: Make the Chocolate Ganache Filling
While the macarons are forming a skin, make the chocolate ganache filling. Place the chopped chocolate in a medium bowl. In a small saucepan set over medium heat, bring the cream to a light rolling boil. Pour the hot cream over the chocolate, and let it sit to acclimatize for 1 minute. Add in the butter and gently stir until smooth. Place the ganache in the refrigerator, and chill until it is thick and spreadable, about 30 minutes.
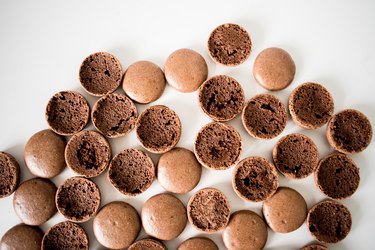
Step 11: Bake the Macarons
When you're ready to bake, heat the oven to 280 F / 140 C. Bake the macarons one sheet at a time for 15 to 20 minutes, rotating the trays halfway through to ensure even baking. The macaron shells will be done when their tops feel firm but the bottoms remain slightly soft. Let the macarons rest on their trays for 30 minutes before sliding the shells off the baking parchment or slip-mat to cool completely.
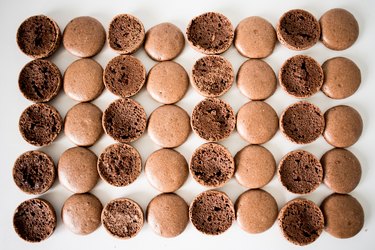
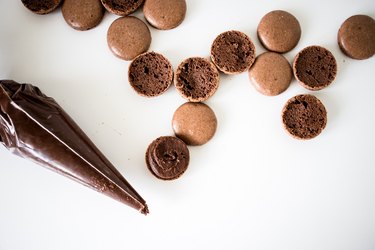
Step 12: Fill the Macarons
Line a baking tray with parchment paper. Place each macaron shell with its same-sized partner on the tray flipped over.
Spoon or pipe the desired amount of chocolate ganache filling onto the flat side of one macaron shell and sandwich it with its partner, gently twisting the top of the macaron until the filling spreads to the edges. Repeat with the remaining macarons.
Step 13: Let the Macarons Chill
Cover the sandwiched macarons with plastic wrap and chill for at least 30 minutes. For optimal texture and taste, store the macarons in a refrigerator for up to 1 day before serving.

Step 14: Serve
You can store the macarons for up to 3 days in the refrigerator. Remove them 30 minutes before serving.