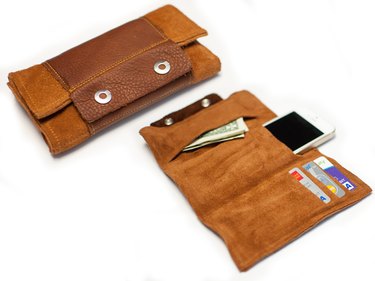
Wrap wallets are convenient catchalls that keep your cell phone, credit cards, ID card and a few dollar bills all in one place. Make one for yourself or to give as a handcrafted gift. Brown leather is always a safe, gender-neutral choice, but you could customize it by using any color.
Things You'll Need
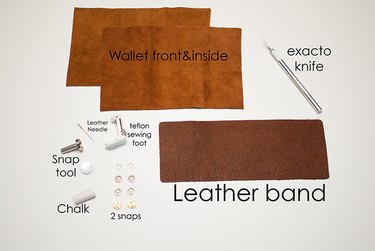
2 leather rectangles (8 1/4 inches by 6 inches)
1 leather band (9 1/4 inches by 3 1/2 inches)
2 snaps (12mm snaps used)
Snap tool
Teflon sewing foot (recommended for sewing with leather)
Leather sewing needle
Heavy duty thread
Utility knife
Chalk
Tip
- The measurements provided are to accommodate an iPhone 5s. For other size phones, you may need to adjust the measurements.
- 1 small leather pelt should work to cut out all of the pieces. You can also check leather shops for a remnant bin as a place to find great scraps.
Step 1
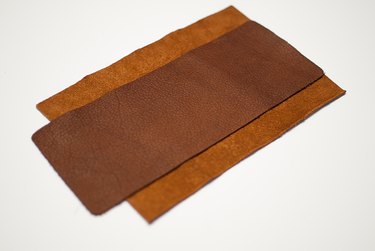
Place the leather band over the front wallet piece. Make sure that the band is centered and hangs over one end by 1 inch.
Video of the Day
Step 2
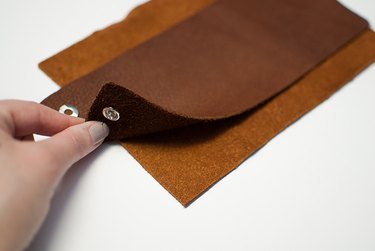
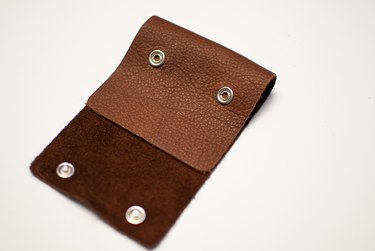
Using the snap tool and following the instructions included with the snaps, add the top pieces of two snaps to the end of the leather band piece that is hanging over. Be sure to place the snaps at least 1/4 inch in from the sides.
Step 3
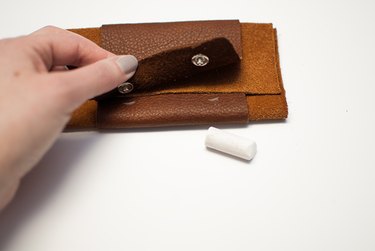
Fold the wallet piece and leather band the way you will fold the wallet by first taking the end of the wallet without the overhang and folding it up 2 3/4 inches. Then take the other end of the wallet with the overhang and fold it over 2 inches so the overhang just meets the other folded edge. Then mark the snap placement on the folded edge using chalk.
Step 4
Using the chalk markings as your placement guide, add the two bottom snap pieces to the leather band piece. You want the fastener side to be on the right side of the leather, to match up with the top snap piece.
Step 5
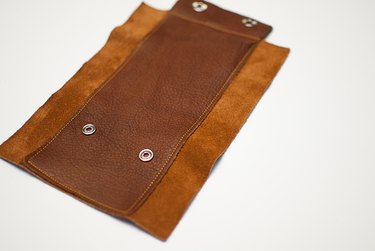
Place the leather band back on the outside wallet piece, centered like before, with the top snaps overhanging. Then sew the band in place by sewing all around the edges.
Tip
If you don't have a teflon sewing foot or can't use one with your machine, try adding some scotch tape to the bottom of your sewing foot (leave an opening for your needle). It will make sewing with the leather much easier.
Step 6
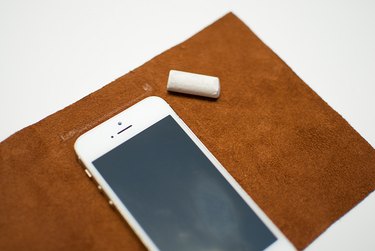
Take the inside wallet piece and mark the fold lines on it, using the outside front piece as a guide (or refer to step 3). In the center 3 inches between both fold lines, place your phone down to mark the width needed for the opening. Draw a line with chalk that is the width of the phone and 1/2 inch down from the top edge.
Step 7
Using a utility knife, cut along the chalk line marked for the phone. Then cut a rectangle opening below that line that is 1/2 inch thick.
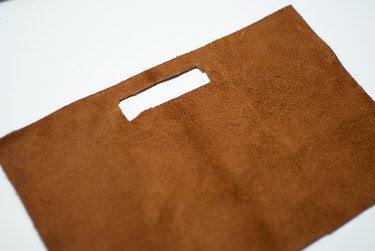
Step 8
Check the phone opening by sliding your phone in. You want the opening to be large enough that you can slide your phone in and out easily, but snug enough that it feels secure. Adjust if needed.
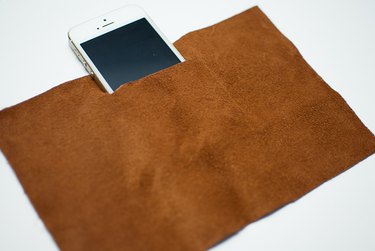
Step 9
Stack your credit cards next to the phone opening so that the first one is about 1/4 inch up from the bottom edge and 1/4 inch away from the side edge. Then spread out the other two cards underneath it until the top card is 1/2 inch from the top edge. Take chalk and mark the width and placement of the card tops.
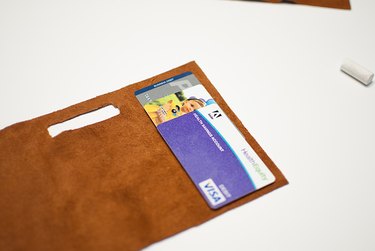
Step 10
With the utility knife, slice open the credit card slots by following the chalk lines. Then for the front pocket, measure 1 3/4 inches in from the edge opposite the credit cards and cut a slit that runs from top to bottom stopping 1/2 inch from both edges.
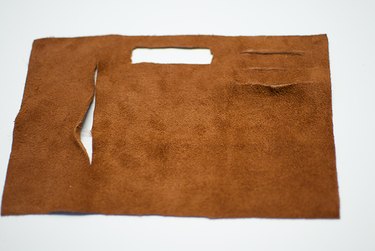
Step 11
Place the inside wallet piece on the outside wallet piece. Be sure that the credit card slots match up with the end without the snap tab. Then sew all along the edges to sew the two pieces together. Lastly, sew along both fold lines to divide the pockets.
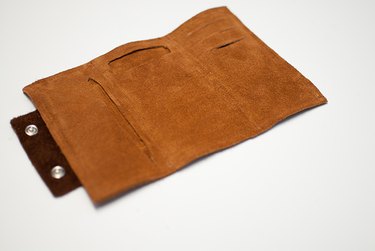
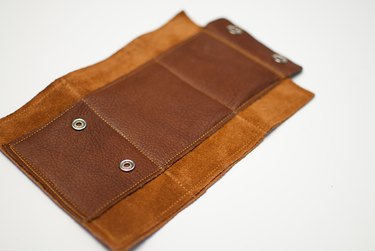
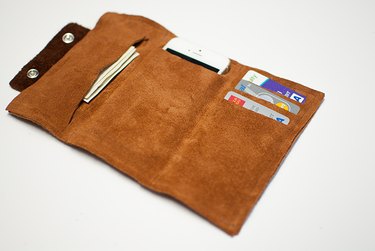
Then place your credit cards, phone and money into the wallet, fold it up, and you are ready to go.
Video of the Day