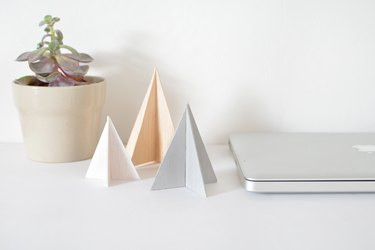
If you want to introduce some modern, handmade decorations into your home this year, look no further. Create festive decorations with the right balance of contemporary style and festive tradition with this simple DIY project. These easy-to-make mini wooden Christmas trees look great displayed on a mantle, a coffee table or even on a desk.
Video of the Day
Things You'll Need
Pencil
Ruler
Balsa wood
Craft knife
Cutting mat
Ruler
Cutting mat
Paint (optional)
Step 1
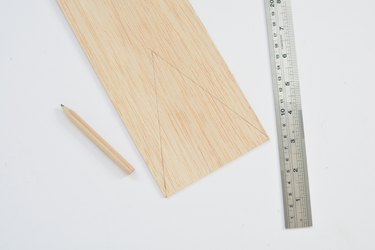
Using a pencil and a ruler, draw two triangle shapes on the wood. The base of my triangles measure 10 cm and the sides measure 12cm in length, so my tree will be a little taller than it is wide.
Video of the Day
Step 2
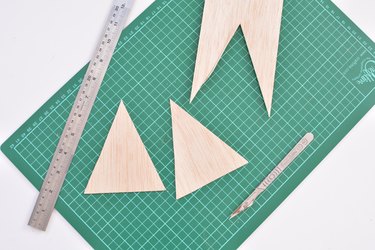
Place the balsa wood onto your cutting mat and cut out the two triangles using a craft knife and ruler. Balsa wood is perfect for this project because it's rigid enough to stand up, but light enough to cut through easily with a knife.
Step 3
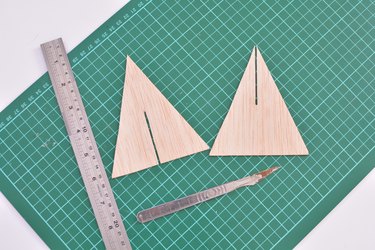
Next, create the slots so you can slide the two triangles together. The slots should be half the height of each triangle (in this case, the triangles are 12 cm high so the slots are 6 cm high). They should also be wide enough to accommodate the thickness of the wood you're using (in this case, the balsa wood is 3 mm thick so the slots are 3 mm wide). Cut one slot from the top of the triangle to the middle and the other from the base to the middle.
Step 4
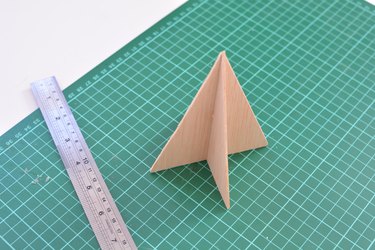
Slide the two wooden triangles together to finish. You can leave them as is if you prefer the look of natural wood, or you could paint them using acrylic craft paint.

I like to create trees in different sizes to make a festive cluster to display around my home. These minimal trees can be easily taken apart to store away for future holidays without taking up much storage space!