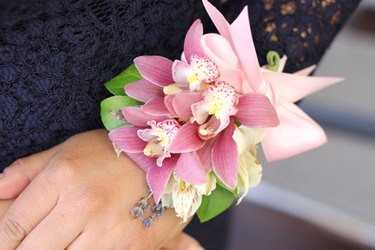
A popular alternative to a traditional corsage is a wrist corsage, especially for those who do not want to poke pins through their dresses. Wrist corsages are also called wristlet corsages or bracelet corsages, depending on what the flowers are connected to. Because they are so easy to take on and off without pinning, wrist corsages are perfect for proms, weddings, homecomings and even special events like Mother's Day or birthdays.
Video: How to Make a Wrist Corsage
Video of the Day
Materials You'll Need
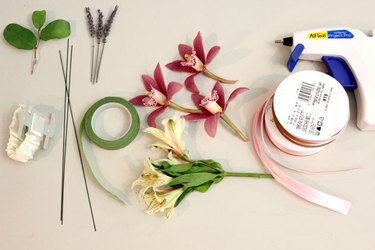
- Main flowers
- Filler foliage
- Floral wire
- Floral tape
- Ribbon, both wide and narrow width
- Elastic wristlet
- Hot glue gun
Video of the Day
Popular Flowers for Wrist Corsages

When choosing flowers for a wrist corsage, select ones that are relatively flat so they are not bulky on the wrist. Chrysanthemums and gerber daisies are popular among younger women for events like prom and homecoming. Roses are the classic choice, but try to choose ones that have opened a bit so they are fuller and lay flatter on the wrist. Orchids are also popular because they retain their moisture and remain fresh for days out of water. Select a maximum of three flower buds for the corsage.
Filler Foliage

Filler foliage will complement your main flowers and add beautiful texture to your corsage. You can use smaller flowers, leaves of all kinds and even feathers. Again, you don't need a lot. If you overdo the foliage, the wrist corsage becomes larger and the size will get in the way during the event.
How to Make a DIY Wrist Corsage
1. Wire the flowers
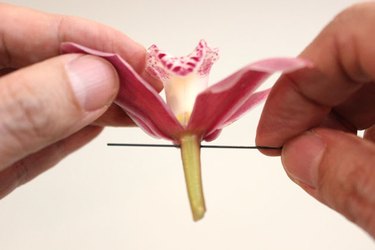
For this wrist corsage, we are using three cymbidium orchids. Cut the stems of each orchid to about 1 inch, then insert a 4-inch piece of floral wire through the stem, right underneath the bloom.
2. Reinforce the stem
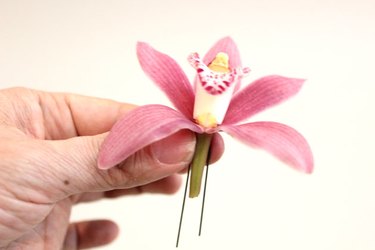
Bend the wire so that there is a 2-inch piece of wire on either side of the stem. The wire helps to reinforce the stem so that it will not snap off.
3. Wrap with floral tape
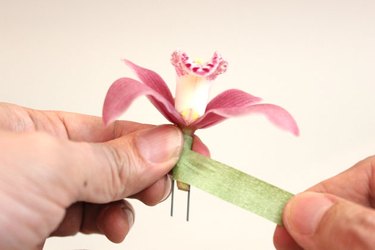
Starting at the top, wrap the wires and stem together with floral tape. Spin the flower as the floral tape goes down, rather than trying to circle the stem with the tape. The adhesive of the tape is activated as you stretch it. If the tape breaks as you are stretching it, just continue where you left off.
4. Add filler flowers
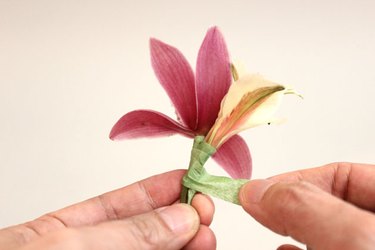
Accent the individual flowers with foliage or smaller flowers, like the alstroemeria pictured here. You do not need to wire these smaller flowers, just wrap them with floral tape directly on the primary flower stems.
5. Tape stems together
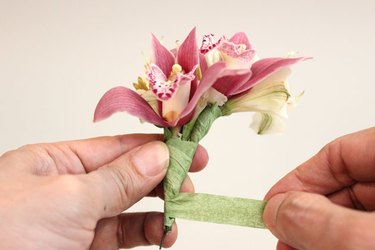
After you have taped the three main flower blooms individually, position two of them in your desired arrangement and wrap these two together with floral tape. Then arrange the third bloom in its desired placement and wrap the third bloom to the first two.
6. Add foliage
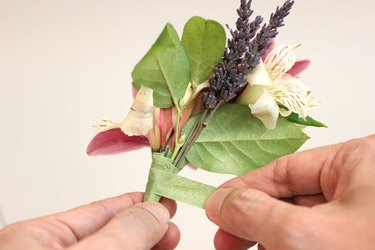
Finish your corsage by adding leaves and any other desired foliage to the back. Besides giving the corsage extra texture, you will use this added filler later to connect the corsage to the clasps of the elastic wristlet.
7. Make the mechanism
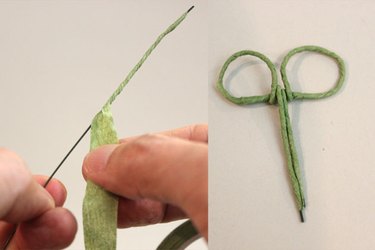
Now that the corsage itself is completed, it's time to create the mechanism that connects the corsage to the wristband. Wrap a 6-inch piece of floral wire with floral tape. Twist the wire into a pretzel shape so that there are two loops on the top and two loose ends on the bottom.
8. Add wide ribbon
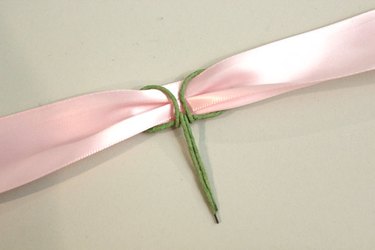
Run a 36-inch long piece of your wider ribbon through the loops so that the outer edges of the loops are covered, while the inside edges are exposed.
9. Add narrow ribbon

Cut a 12-inch piece of your narrower ribbon and hot glue the center of it to the front of your corsage. The hot glue will not harm the flowers—the layers of floral tape provide protection.
10. Tie the narrow ribbon
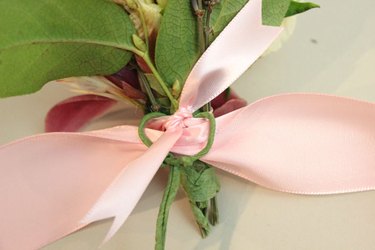
Thread the ends of the narrow ribbon through the loops of the mechanism, where the wider ribbon already sits, and tie a knot in the back. The corsage is now connected to the loop mechanism.
11. Attach the elastic wristlet
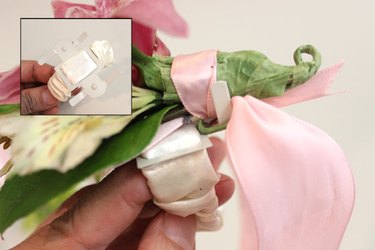
The elastic wristlet comes with a metal plate and four tabs that are used for attaching the corsage. Place the corsage on the metal plate and bend the tabs so they grip onto the corsage. Insert two of the tabs in the loops of the wire mechanism you created and pinch the loops to lock the tabs. Wrap two of the tabs around the leaf foliage that you added to the corsage's back.
12. Tie around plate
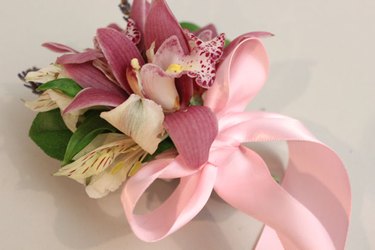
Once the corsage is held by the tabs, wrap the 36-inch wide ribbon around the metal plate and the front of the corsage. Tie a knot and a bow in the front so the corsage is absolutely secure and will not fall off the wristlet. Place the corsage in a plastic bag and store it in the refrigerator to keep it fresh until the event. Ideally, you should make the corsage the day of the event or the night before.