It's easy to make a box out of a sheet of paper, and it can be accomplished by children as well as adults. Paper boxes can be used for class projects, a gift or favor containers at a birthday party. If young children are making paper boxes, they'll need an adult to help them cut the pattern out of the paper.

Video of the Day
Things You'll Need
Pencil
Ruler
Pattern
Scissors
Sheet Of Paper
Glue
Step 1

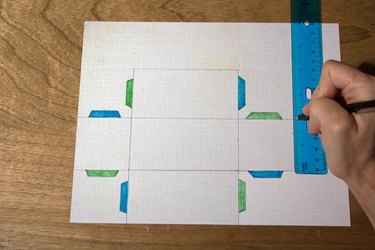
Measure out the pattern onto the paper using a ruler. Each long side will be 4 inches long, and each short side will be 2 inches long. Draw out the pattern on your paper as you measure, remembering to include the tabs marked in green and blue in the pictured diagram. You don't need to color these tabs on your own pattern.
Video of the Day
Step 2

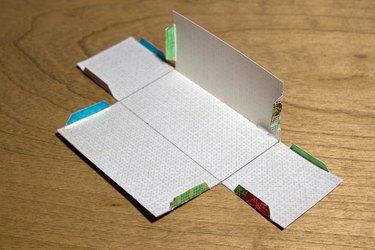
Cut out the shape with scissors. Help younger children with this step. Be careful when cutting out your shape so that you include the tabs. The tabs are important to help secure the box. After the shape is cut out, fold in the tabs toward the inside of the box. Fold up the ends and the sides and crease them to make a clean fold.
Step 3

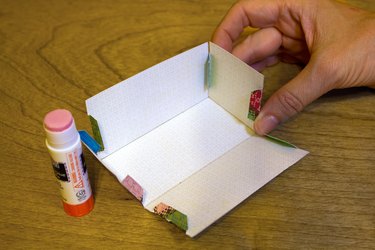
Place a dollop of glue onto each green tab, and press it together with the blue tab next to it. Your tabs won't be colored, so keep a copy of the pattern next to you if you're confused. Glue all of the tabs together and let the entire box dry for about 30 minutes. Once the box is dry, color it or paint it however you choose.
Tip
Use preprinted scrapbook paper for a more decorative box.
Warning
Help younger children use scissors.