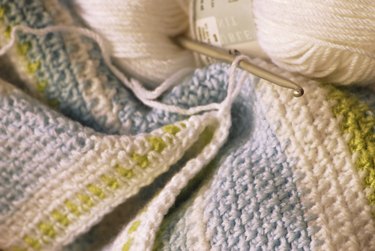
The single crochet stitch is among the most basic for beginners in the wonderful world of crochet. It's easy to understand why: This stitch works up relatively slowly compared to other stitches, creating a dense and solid crochet fabric that's perfect for making scarves, placemats or—if you're feeling ambitious—a single crochet blanket.
If you're ready to take on the challenge and practice the meditative repetition of single crochet stitches to form a blanket, we've got you covered with this step-by-step beginner crochet blanket guide. You'll finish feeling like an expert at single crochet stitches—but first, dive into our quick single crochet tutorial to tackle the basics. Read on to learn how to make a single crochet stitch, choose your crochet hook size, select yarn and master a blanket made of basic crochet stitches.
Video of the Day
Video of the Day
Part 1: Choosing Crochet Hook & Yarn
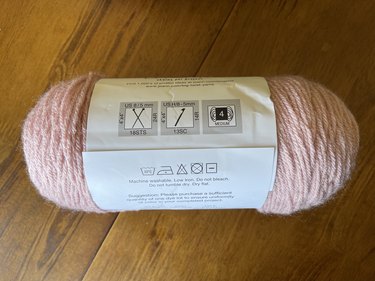
The first step in any crochet project—including a single crochet blanket—is to select the appropriate crochet hook and yarn. If following a specific crochet pattern, the pattern creator or company might include yarn and hook size recommendations in their instructions. But if you want to create your own single crochet blanket using our tutorial, you have ample options for yarn type and crochet hook size.
We recommend starting with yarn. Choose one that inspires you—it could be a super soft and plush blanket yarn such as the Bernat Big Ball Blanket Yarn or a lightweight cotton yarn like Loops & Threads Crème Cotton Yarn from Michaels. It's important to remember that the thicker the yarn, the quicker the project builds up. That is, if you opt for chunky weight yarn, you'll likely create a crochet blanket much faster than you would with a thinner yarn.
With the desired yarn in hand, it's time to choose an appropriately sized crochet hook. The best crochet hook size for a single crochet blanket depends entirely on your yarn (which is why you want to pick that first!). Take a look at the back of the yarn label for a crochet hook image. Next to this image, there should be a letter or number (or both) that indicates the best hook size for your yarn's weight. While we don't recommend sizing down, as this can make hooking and looping yarn very difficult, you can certainly select a larger hook to craft a blanket with loose stitches and a more netted finish.
How much yarn do I need for a crochet blanket?
When making a crochet blanket, you’ll likely use more than one yarn skein. Some companies such as Lion Brand make this easy with an online chart that lists recommended yarn amounts by weight. Once you have an idea of yardage, explore how many yards come in each skein (this varies depending on yarn type and brand) to get an idea of how many skeins you’ll need. The "We Are Knitters Skein Calculator" is another excellent resource as it allows users to input information such as project type, stitch type and desired length and width to determine skein amount.
Part 2: Single Crochet Stitch Tutorial
Making a crochet blanket takes time, patience and a little practice. If you want to master the art of crochet, tackle the single crochet stitch before diving into a full project. Luckily, this stitch is fairly simple and entirely beginner-friendly. It also creates a beautiful stitch pattern that looks deceptively intricate.
1. Make a chain
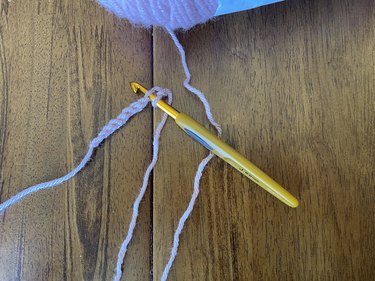
To create a single crochet stitch, start by making a chain. The number of chain stitches used depends entirely on your project's desired width. For practice purposes, we recommend making a swatch by creating a foundation chain with 11 chain stitches (aka loops). Once you have 11 stitches, skip the loop closest to your hook (the 11th loop), insert hook into the top of next chain loop (the 10th loop) and pull yarn onto hook. At this point, you should have two loops on your hook.
2. Create stitch
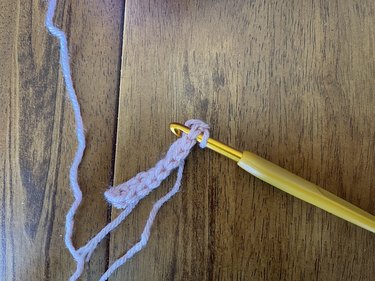
Next, use the hook to grab onto yarn and pull it through both loops to create a single crochet stitch. To practice, move forward with the next stitch and continue down the row until you have 10 single crochet stitches. Create a new crochet row and repeat this process until you feel comfortable enough to move on to the single crochet blanket tutorial.
How do I start a new row in crochet?
Before creating a crochet blanket, practice creating a new row using the single crochet stitch test you just completed. When you reach the end of the row, you should have one loop left on your hook. To create the next row, chain one into that loop—this will create height for the next row and correspond with the height of a single crochet stitch.
Flip your work so the hook remains in your right hand and the sample row of stitches sits to the left of the hook. Insert hook into first stitch (it looks like a V) and follow the steps to create a single crochet stitch. Continue until you have a second row of 10 stitches and repeat as needed.
Part 3: How to Create a Beginner Crochet Blanket
Things You'll Need
Yarn of your choice (Bernat Big Ball Blanket Yarn is an excellent option for beginners)
Crochet hook in corresponding size
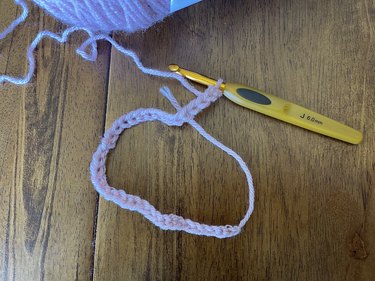
Single crochet blankets are the ultimate beginner-friendly crochet project as they require knowledge of just one simple crochet stitch and a foundation chain. And, since they take a while to complete, you'll have plenty of crochet practice under your belt by the time you finish.
What is a foundation chain in crochet?
Most crochet projects require a foundation chain to start: A row of chain stitches used to anchor the first row of stitches. A foundation chain is a chain made from yarn that's achieved by creating recurring hook loops. To create a foundation chain, begin with a slip knot. To do this, wrap end of yarn around your finger twice and pull the piece of yarn closest to your knuckle over the piece of yarn closest to your fingertip. Next, pull the yarn closest to your knuckle over your finger so you’re left with one loop. Pull up on the loop to tighten slip knot. Then, insert crochet hook into loop, hook yarn and pull it up onto hook. Repeat this step until foundation chain reaches desired length (typically the width of a blanket).
1. Create foundation chain and first row
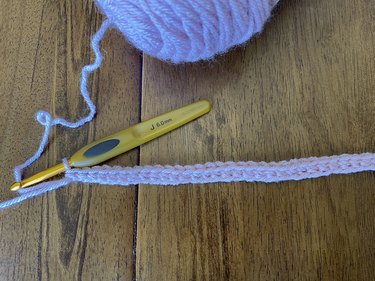
First, create a slip stitch followed by a foundation chain using instructions above. The number of chain stitches in the foundation will vary depending on preferred project width. For a throw blanket, we suggest starting with around 200 chain stitches. Upon reaching desired width, chain one more, skip that first stitch and insert hook into top of the second chain stitch from the crochet hook. For example, if you stitch with the recommended 200 stitches, chain one so you have 201 stitches, skip that 201st stitch and insert your hook into top of the 200th stitch.
With hook inserted into second chain stitch, create the first single crochet stitch by hooking yarn and pulling up a loop so you have two loops around the hook. Hook yarn again and pull it through both loops to complete single crochet stitch. Continue until entire foundation chain has a corresponding single crochet stitch, all the way through to the first chain you created.
2. Add second row of stitches
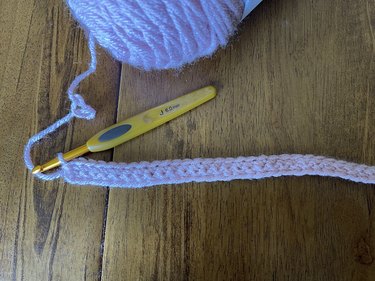
Upon reaching end of first row, chain one to start second row (this will give the row some height so it stacks directly on top of the next row) and insert hook into first stitch (which is technically the last stitch from first row) by slipping hook under both strands of the "V" on top of stitch. Repeat this all the way down row until you have another row of single crochet stitches that stacks atop previous row.
Tip
To create a ribbed effect, insert hook into outer strand (the one facing away from you) of the “V.” As you create more rows, this will leave a slight space between each row that resembles a ribbed texture.
3. Continue creating rows
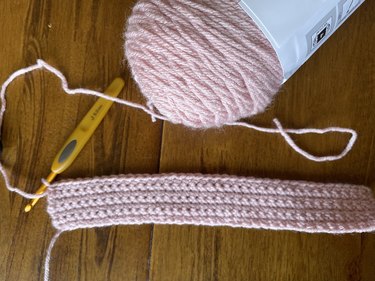
To add blanket length, repeat steps one and two. Add rows of single crochet stitches until reaching desired size. Since yarn size plays a big part in how tall stitches are, the number of rows used will vary based on yarn weight.
4. Tie off yarn and weave in ends
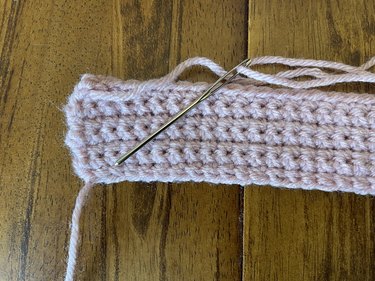
When you reach the end of your last row, cut yarn (leaving a 10-in. tail) and pull it through the last loop on hook. Thread tail through the end of a yarn needle (also called a darning needle) and weave it in and out of a few stitches. Clip excess tail to finish and repeat this step to hide foundation stitch tail.
With these easy tips for single crochet stitching, you'll be an aficionado in no time. Here's to your next cozy homemade creation!