
When you're learning to knit on a simple loom, the easiest go-to projects are bulky beanies and flat scarves. Bump up your crafting finesse by knitting an impressive striped tote -- but using a simple beginner stitch. Make cozy knitted bags to gift your friends for the holidays or a set for the car for eco-friendly shoppers.
Things You'll Need
22-inch rectangular knitting loom
Loom hook
Drinking straw
Several skeins of yarn
Scissors
Yarn needle
Measuring tape
Rivets
Leather trim or straps
Video of the Day
Step 1: Casting onto the Loom
Tip
Create a threading wand by cutting a drinking straw and threading your yarn through it before tying onto the loom. This makes wrapping the pegs of the loom easier and faster for both beginners and experts alike.

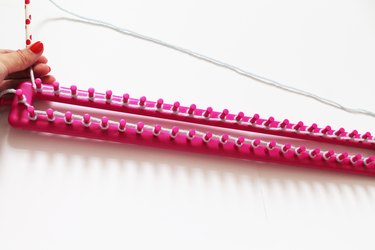
Tie the yarn end in a half-knot on a peg at one end of your loom, leaving a 2-inch tail.
Video of the Day

Using your hands or a threading wand, wrap each peg on the loom, wrapping from behind, in a clockwise motion.

Continue wrapping each peg until you reach your starting point. Take care not to let go of the yarn -- your work will quickly unravel.
Step 2: Knitting rows
To knit the first row, repeat wrapping all the pegs until every peg has been wrapped twice.

Using your loom hook , pick up the bottom loop and pull up and over the top loop and peg, releasing it at the interior of the loom.

Repeat this step on every peg to complete the first row.

Tip
Create a clean rolled hem on the top edge of your bag by knitting approximately 2 inches, then feeding the bottom edge up through the center of the loom, and placing the first loops back over the corresponding pegs. Simply knit as if it were a regular row, and continue knitting the body of the bag. This keeps the edge from curling inward and provides additional stability when attaching straps to the bag.
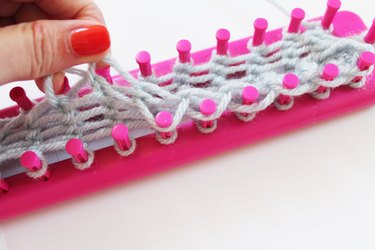
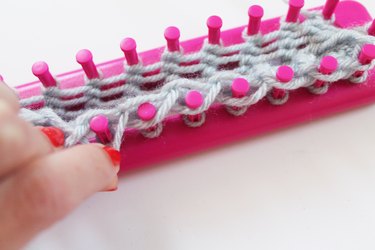
Complete additional rows by re-wrapping all the pegs and repeating the steps. When you have completed approximately 15 inches of knitted rows, you're ready to cast off from the loom.
Tip
Achieve a color-blocked pattern by cutting and tying on a new color of yarn at the end of a row.
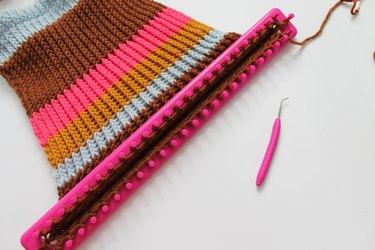
Step 3: Casting off
After you finish the last row, pass the yarn end behind the second-to-last peg.
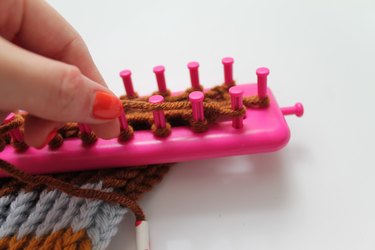
Wrap the yarn around the peg and knit as if you were completing a stitch in a row.

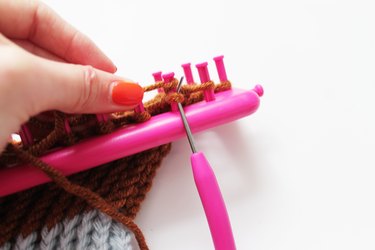

Catch the finished stitch with the loom hook and place it on the last peg.
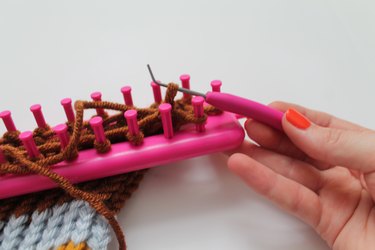
Knit the last peg, and place the finished stitch back on the second-to-last peg.
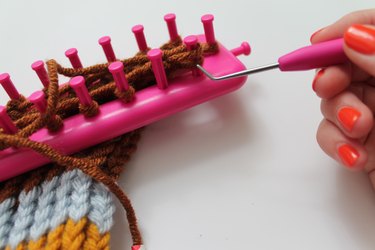
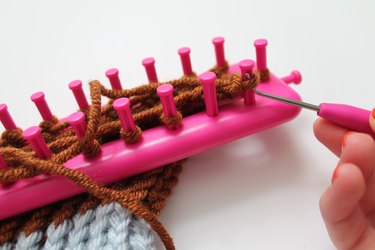
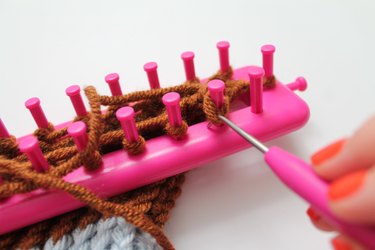
Repeat these steps until you have a bound edge, and your knitting is disconnected from the loom.
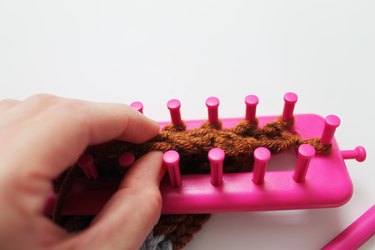
Step 4: Create bottom seam
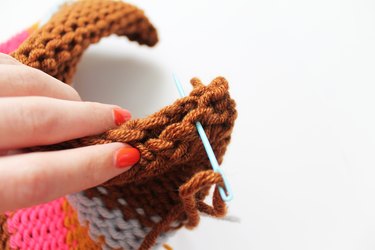
Cut a long length of yarn and thread it through the yarn needle. Turn knitting inside out and stitch the opening using a simple whip stitch so the seam will appear on the interior of the finished bag.
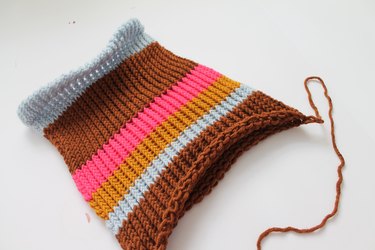
Step 5: Attach shoulder straps
Measure and choose placement for straps. Feed the strap ends through gaps in the knitted piece and secure them in place with metal rivets.
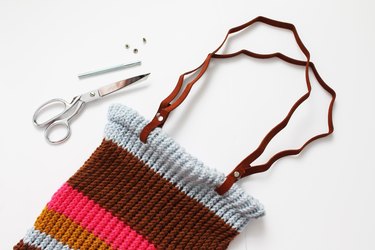
Your finished bag makes the perfect catchall for running to the farmers' market or a day trip to the shore. Customize your bag shape and color by experimenting with different yarn textures and sizes of looms.


Have questions about a step in this project? Leave them for us in the comments section below.