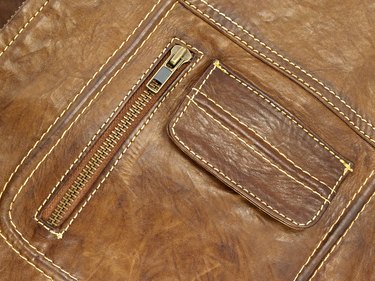
Whether you buried a leather jacket in the back of your closet or found a scruffy one on the cheap at the local thrift store, you can restore it to make it look as good as new. Gather together a leather cleaner, colorants and conditioners, and finish off with a protective finish to waterproof it, protect it against cracking and extend its life.

Video of the Day
Things You'll Need
Leather Binding Agent
Leather Crack Repair Product
Vinyl Gloves
1200-Grit Sandpaper
Protective Finish
Leather Colorant Or Dye
Spatula
Leather Conditioner
Leather Cleaner
Paper Towels, Sponges Or Lint-Free Cloths
Step 1
Find a location to hang the jacket where it won't touch other garments during and after the restoration process, such as in a guest room, a garage or an outdoor shed.
Video of the Day
Step 2
Examine the leather jacket for oil spots or stained areas; start cleaning those areas first. Dab the leather cleaning product onto a paper towel, sponge or soft lint-free cloth, and work it into the surface of the jacket, starting with the worst stained areas first. After cleaning the bad spots, clean the entire jacket again, rubbing in small circles as you work across its surface.
Step 3
Strengthen the leather by applying a leather binding agent to the jacket. For badly cracked leather, apply three to five coats of the binding agent, ensuring each coat dries thoroughly before applying the next. Wipe off excess on leather seams or top-stitching.
Step 4
Take a spatula and scoop some of the crack repair product onto the heavy cracks after applying the product to strengthen the leather. Use the spatula to spread the crack repair product into all the heavy cracks. Let it dry for 30 minutes and then sand these areas smooth with fine or 1200-grit sandpaper. If desired, add another coat of the binding agent over the entire jacket after repairing the large cracks.
Step 5
Apply the water-based or alcohol-based leather colorant to the jacket to the discolored areas first with a small sponge. Work from the discolored areas out to the rest of the jacket, dabbing the jacket with the dye-laden sponge. Apply one coat of dye and then let it dry per the instructions on the container before repeating a second coat. After applying the last coat of dye, as necessary, hang the jacket where it can dry overnight undisturbed.
Step 6
Coat the jacket with a conditioner, especially if you used an alcohol-based dye, which can make the jacket stiff. Conditioners soften the leather, and some may add a gloss shine to the jacket, while others do not, based on the product type chosen. If you have a conditioner cream, rub it on with a sponge or paper towel, in small circles. Use a sponge to apply the conditioner, working in small circles across the jacket's surface. Add two or three coats as needed, letting each application dry according to manufacturer's instructions and humidity.
Step 7
Cover the jacket with a protective finish to help it bead water and to protect it from ultraviolet rays. Protective finishing agents are available as spray-on products, creams or liquids. Apply the protective coating to the jacket with a soft clean cloth, again rubbing in small circles. Protective finishes generally require only one coat, but you can apply two, if desired.
Tip
You can also use rubbing alcohol applied to a soft, lint-free cloth to clean your jacket before coloring it.
Once you’ve restored your jacket, coat it once or twice a year with a protective finish product to preserve the leather and its color.
Warning
Wear vinyl gloves and work in a well-ventilated areas, as people with sensitivities can react to the chemicals.
Only use dyes intended for leather, as other dyes may ruin the leather or react with it.