Things You'll Need
Baking sheet
Wax or parchment paper
Heat source or dehumidifier
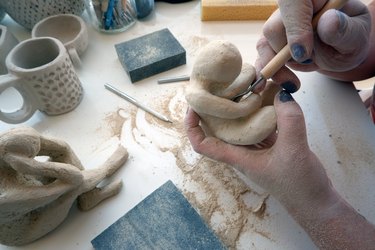
Sculptures made with an air-dry clay, such as paperclay, remain a fun and popular way to create art. As part of the process, though, it can take 24 hours or longer to dry, depending upon the size of the sculpture. Not surprisingly, many artists and DIYers continually look for ways to accelerate the drying process. However, because drying is one of the most important steps in the sculpting process, it must be done with care. To speed-dry your sculpture, try one of these methods to complete your project.
Utilize the Sun
Step 1
Place your sculpture on a baking sheet covered with wax or parchment paper. This will give your sculpture a clean, level surface on which to dry.
Video of the Day
Step 2
Place the baking sheet with the sculpture in a window sill or another dry place that is well-lit by the sun and shielded from the wind. Any wind stronger than a light breeze can topple your sculpture, damaging any fine details.
Step 3
Check your sculpture every 10 minutes, turning it to ensure even drying. The strength and heat of the sun, as well as the size of your sculpture, will determine the drying time. Set a timer if necessary.
Portable Heat Source
Video of the Day
Step 1
Using a portable heat source, such as a hair dryer, heat lamp or space heater will give you additional flexibility, especially in the absence of the sun.
Place your sculpture on a baking sheet covered with wax or parchment paper.
Step 2
Set your heat source to a medium-heat setting, if applicable. Keep the heat a minimum of 4 to 6 inches away from the sculpture. If you're using a hair dryer, hold it steady throughout the drying process.
Step 3
Check your sculpture for dryness every 2 to 3 minutes, turning it to ensure even drying.
Use the Oven
Step 1
Set your oven — conventional or toaster oven — to preheat at 200 degrees Fahrenheit.
Step 2
Prepare your sculpture by placing it on a baking sheet covered with wax or parchment paper.
Step 3
Place the baking sheet in the middle rack when the over is heated. Leave the oven door slightly ajar to help vent any steam.
Step 4
Check the sculpture every 10 minutes, turning it to ensure even drying. Dry the sculpture on all sides before removing it from the heat. Drying time will depend upon the size of the sculpture.
Try a Dehumidifier
Step 1
Heat isn't the only way to speed-dry air-drying clay. If you are serious about sculpting, or you will be doing a lot of sculpture, consider investing in a dehumidifier. Dehumidifiers remove the moisture from the surrounding environment, drying your sculptures quickly and safely.
Drying sculptures with a dehumidifier should be done in an enclosed space, such as a closet, cupboard or small room. If you do not have such a place, you can easily create one.
Identify a corner of a room that can be used for drying your sculpture. Ensure the space is adequate for both the dehumidifier and your sculpture.
Step 2
Make a wall or barrier to place around your sculpture and dehumidifier. Do so by fastening the ends of a bed sheet or shower curtain to each wall near your dehumidifier. String a clothesline between two nails to hand the sheet or curtain if necessary. You can also make an effective barrier with cardboard.
Step 3
Avoid checking your sculpture at frequent intervals, as there is no chance of burning or over-drying your sculpture. This allows you to dry multiple sculptures of different sizes simultaneously. Once the sculptures are placed in the new dehumidifying environment, you can immediately begin on your next sculpture, checking the others for dryness at your convenience.
Tip
Always use potholders, towels and other hand protection when handling hot objects.
If cracking appears, remove your sculpture from heat immediately. Repairs can be made with wet clay once your sculpture has cooled completely.
Do not place your sculpture in a refrigerated environment immediately after baking to cool it faster. Extreme temperature changes can cause the sculpture to crack.
If you have a large sculpture, consider drying it in pieces. Your sculpture can be reassembled using wet clay or glue after it has cooled.
Warning
- Drying clay sculptures too quickly can result in cracking or other damage.
- Oven-drying painted sculptures can cause the paint to crack or chip.
- Always wear proper hand protection to avoid burns.
- Obey all safety procedures and operating instructions when using the equipment.