Things You'll Need
Generator or power inverter
Car or motorcycle battery (optional)
Gasoline (optional)
Drill
Drill bit
2 eyehooks
2 straps with hooks
Extension cords
Lights

Turn your parade float into a festival of lights by using different types of light sources. Nighttime parade floats rely on lighting to make the float and participants visible but also to create a mood and feel for the scene. Selecting the right type of power source and lighting for your float is important, so work it into the first stages of your blueprint to create a cohesive design.
Power Source Selection and Installation
Step 1
Decide if you would like to have a gasoline-powered generator or a power inverter. Generators are available in quiet models that operate at less than 60 decibels. Power inverters run off of power from an automotive or motorcycle battery. They are less expensive but provide less power. Calculate the amount of wattage you think you will need and find the option that best fits your requirements.
Video of the Day
Step 2
Design a platform at the back of the float for your power source. Ensure that there will be no decorations touching the area. Place the space a foot from the edge of the float so that the float skirting does not touch the equipment.
Step 3
Drill holes for eyehooks on either side of the platform. Screw in the eyehooks. Place the power source on the platform. Run straps across the inverter or the generator and hook each end into the eyehook. Tighten the straps.
Step 4
Plug two extension cords into the inverter -- one for the left side of the float and one for the right. For generators, plug a splitter into the two outlets on the front, or run four extension cords of varying lengths from the four outlets this provides. For example, run a long cord to reach the front of the float and a shorter cord for the middle or back on each side.
How to Light the Parade Float
Step 1
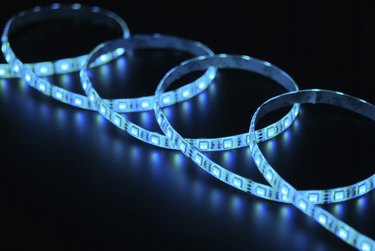
Outline the edge of your float to give it definition. This also helps passengers on the float stay safe by knowing where the float drops off. Run flat LED strand lighting around the edge of the float. LED strand lights can be set to any color. The lights can also change colors, blink or be set to move in sequence to music. Most LED lights can be controlled by a remote. LED lights emit little to no heat, reducing the possibility of accidental burns by parade riders. LEDs also use less energy than traditional lights and have a longer life so you can use them for years to come. Use colored or white rope lighting to outline your float if flat LED strand lighting is cost prohibitive. Rope lighting will still illuminate your edge, but attach the lighting to the front edge of the float as opposed to the top edge so that no one will accidentally touch or step on it.
Step 2
Highlight areas with spotlights. Use floodlights to draw attention to an area or a person on your float. Clip or bracket floodlights to the floor the float. Point the floodlight to shine on the area you are highlighting. Alternatively, mount floodlights on the back wall of a float to cast light down upon an area. Use colored floodlights to match your theme.
Step 3
Create a holiday or ethereal feel with Christmas lights. Use Christmas lights in trees, clouds and on bushes to create a twinkle effect. Set a soft, glowing ambiance by placing strands of Christmas lights behind sheer fabrics. Use LED bulbs for a better quality light and less pull on your amperage.
Tip
When using an inverter, do not run it in the staging area prior to the parade. There is no way to recharge the battery and you may not make it through the parade.
Warning
Do not use foil decorations near electrical equipment and lighting, as foil is an electrical conductor.
Carry a fire extinguisher on the float and inside the tow vehicle.
Do not to overload circuits.
Tape all wiring down so no one will trip and hurt himself.
Do not staple float materials into the wires.
Video of the Day