Things You'll Need
Soft rag
Light dish detergent
Small screwdrivers
Toothpicks
Tweezers
Canned air
Liquid wrench
Brush
Sewing machine oil
Turtle wax

Buying an old singer sewing machine at a garage sale can be a great find. Your great-grandmother's singer that has been sitting in your attic can be put to use. Antique sewing machines can be restored and used once cleaned correctly. There is no need to take your great garage sale find or your family antique to a professional restorer, you can do it yourself with a little time, elbow grease and the right tools.
Step 1
Dust off the sewing machine with a soft rag and warm water to remove dirt and dust. Do not do any hard scrubbing at stains or deposits, that will come later.
Video of the Day
Step 2
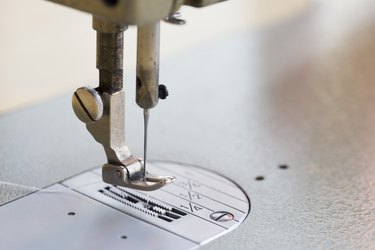
Using screwdrivers, remove the throat plates. Dust and thread collect in the feed dogs, and these can be removed with the toothpicks, tweezers, and canned air. Use canned air sparingly, as it can drive some dirt further into the machine.
Step 3
Remove all access plates, the motor, light, and hand wheel. Look at all moving parts to determine where there is any corrosion or accumulation of dirt and grime. Use Liquid wrench and a brush to clean off old grease and oil buildups on all parts.
Step 4
Liberally apply Liquid wrench to all moving parts. Try moving these parts little by little to get the grease into every small hole the machine has. The more it moves, the more it will be greased and move more easily.
Step 5
Lightly grease the entire machine with sewing machine oil once it has begun to move easily.
Step 6
Reassemble the machine and use it. The more use it gets the more it will run well.
Step 7
Clean off excess oil from the machine by using a soft rag with warm water and a mild detergent.
Step 8
Restore the outside of the machine by using mild detergent and a brush on the decals. If there is extensive grime on the decals, try using liquid wrench to loosen it up. Test the liquid wrench in an inconspicuous place to be sure that it does not change the color of the decal. If liquid wrench does change the color, other cleaning solutions that may work are 409, Simple Green or Windex.
Step 9
Gently rub turtle wax to the outside of the machine to make it shine like new.
Tip
Some machines have so much grime that general cleaning will not work. Try removing the plates and then soaking the entire machine in kerosene for up to a week. If the machine is so stubborn and stuck that it will not move at all, use a wrench and brute force (along with liquid wrench) to get it to move. If it moves so much as an inch, you are winning and keep up the good work until you get it moving normally.
Video of the Day