Things You'll Need
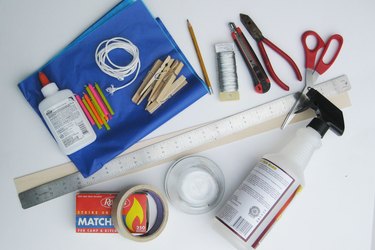
8 sheets of tissue paper
Fire retardant spray
Balsa wood
Ruler
Wire
Wire cutters
Scissors
Utility knife
Pencil
Rope or clothesline
Clothespins
Paper weights
Poster board or cardstock
White glue
Masking tape
Scrap cotton fabric
Birthday candles
Pliers or tongs
Matches or lighter
Template (See Resources)
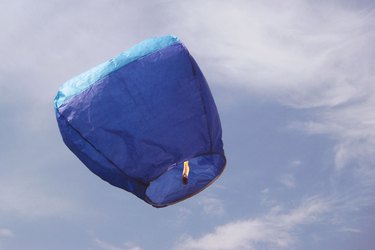
Flying paper lanterns are like small hot air balloons, made of tissue paper and a simple fire source. Most of the supplies can be found around the house and only takes a couple of hours to complete. They can be launched for fun or as part of a celebration. Many people also believe that releasing a lantern is good luck. You can write your wishes or worries and send it off into the sky.
Note: Flying lanterns are a serious potential fire hazard and are banned in 30 states. Please check on the legality of flying paper lanterns in your state.
Video of the Day
Supplies
Step 1
An important part of keeping you and your lantern safe is to use fire retardant spray on the tissue paper. It can be found at some hardware stores and online.
Step 2
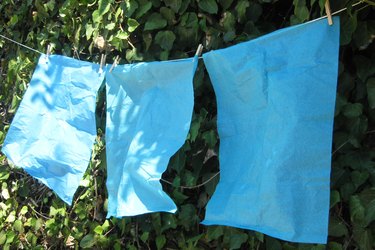
Hang each sheet of tissue paper on a clothesline and spray from the bottom up with fire-retardant spray. Don't soak the top where the clothespins are -- the paper is weak when wet and can easily tear. Allow to hang until dry.
Step 3
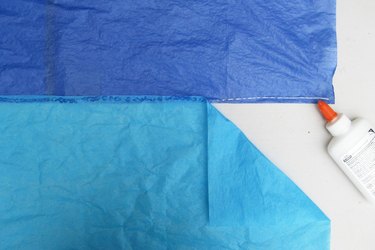
Glue two pieces of tissue paper together so the resulting sheet is large enough for our 35 inches by 22 inches lantern. Lay the first piece horizontally and glue the second piece along the bottom, overlapping them by about a quarter of an inch. You can make your lantern unique by using two different colors. Make four sets of these sheets.
Step 4
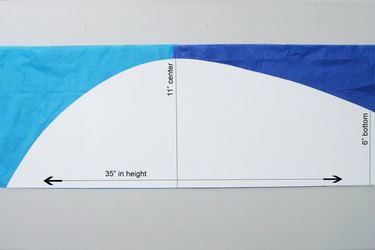
Use cardstock or poster board to create a template for the lantern following the measurements in the picture (it's turned sideways, so the bottom is on the right). The bottom of the template should be 6 inches and the center should be 11 inches, with an overall height of 35 inches.
Step 5
Fold a sheet of tissue paper sheet in half vertically and lay the template on top with its straight side along the folded edge of the tissue. Trace the pattern and cut it out, then repeat three more times so you have all four walls of the lantern.
Step 6
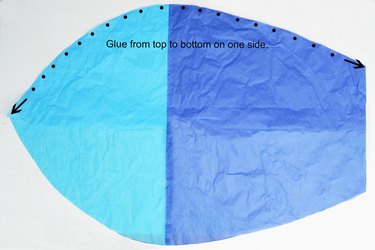
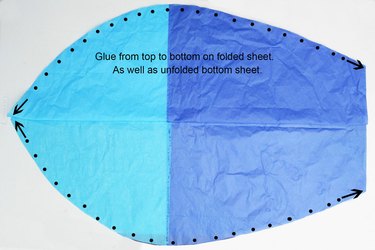
Lay one of the walls down, flat and unfolded, to prepare to glue the walls together. Apply a thin line of glue from top to bottom along one side of the paper. Lay the second unfolded sheet directly on top, gluing the two sheets together on one side only.
Step 7
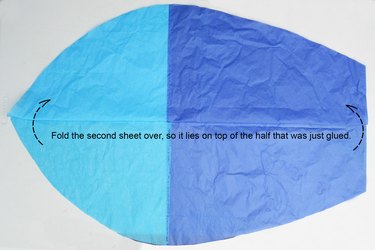
Fold the second wall over, so it lies on top of the half that was just glued.
Step 8
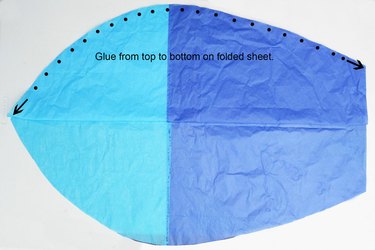
Apply a thin line of glue from top to bottom along the curved edge of the folded sheet. Lay the third unfolded sheet directly on top, gluing the second and third walls together on one side only.
Step 9
Like you did to the second sheet in Step 7, fold the third sheet over, so it lies on top of the two glued halves. Apply a thin line of glue along the curved edge of the third sheet as well as the unfolded bottom sheet. Lay the final sheet on top, completing the four walls of the lantern. Allow the assembly to dry completely.
Step 10
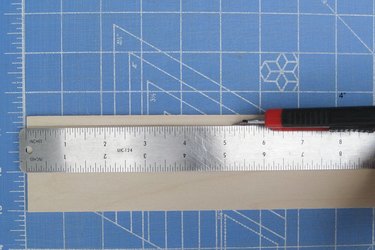
Make the wooden hoop from a 1/16-inch thick piece of balsa wood. Using a sharp utility knife and ruler, cut two strips, each 1/4-inch wide by 24 inches long.
Step 11
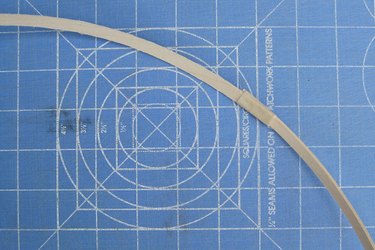
Tape the two pieces of wood together on one end. Gently bend the opposite ends until they meet, making a circle, and then tape them together.
Step 12
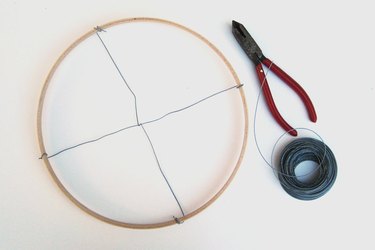
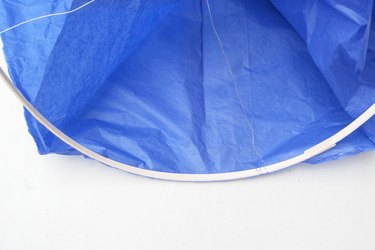
Use two pieces of wire to create an "X" in the hoop. Wrap each end around the wood to secure.
Step 13
Complete the lantern by attaching the tissue paper balloon to the hoop. Apply a thin line of glue along the inside edge of the tissue paper. Do one small section at a time, rolling the frame on top and pressing together with your fingers. Make sure there are no holes or open spaces.
Step 14
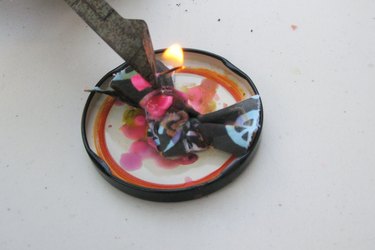
Your fire source needs to be both light and hot enough to enable the lantern to float. Take a 10-inch strip of cotton fabric, fold it in half, and tie it in a knot, giving you a small bow. Place it in a lid from a jar or on tin foil. Using pliers, drip wax from a lit birthday candle over the fabric. It may take 2-3 candles to cover it thoroughly.
Step 15
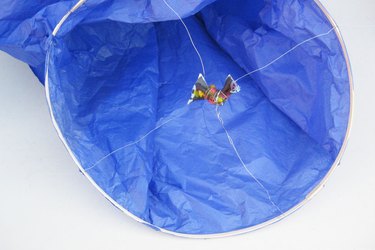
Cut a long piece of wire and wrap it around the bow a few times, leaving about 6 inches on each side. Attach it to the center of the wire "X" by wrapping all the wires together.
Step 16
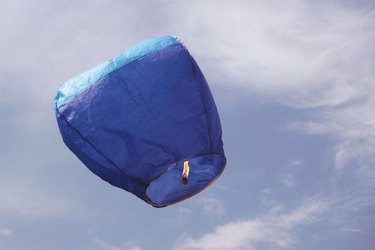
Be extra careful when lighting the lantern. Keep your distance from dry areas and power lines. With two people holding the bottom, light the fabric. It will take a couple of minutes to fill the lantern with hot air. Once it's ready, you can feel it lifting away from your hands. Let it go and watch it fly.
Tip
Alternative fuel can be made by soaking cotton balls in ethanol and attaching it to the frame with wire. It won't last long, so you need to light it right away.
You can attach a string to your lantern to recover it after it’s launched. This will alleviate worry of littering.
Warning
Do not light lanterns indoors or in dry areas.
Fly your lantern in an open space away from trees, wires and public streets.
Lanterns should not be released on rainy or windy days. Wind could blow the lantern into an object such as a tree or roof, which could catch fire.
Do not fly your lantern near an airport (within approximately 5 miles).
Keep lanterns out of reach of children.
Wear gloves when lighting the lanterns to protect hands.
Have water or a fire extinguisher nearby in case of emergency.
Do not light/fly torn or damaged lanterns.
Check your state's regulations, as some have restrictions regarding flying lanterns due to the fire hazard. It is illegal to launch flying lanterns in some states.
Video of the Day
