Things You'll Need
One or more fur coats
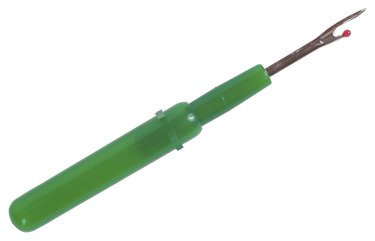
Seam ripper
Yardstick or straight-edge
Fabric marking pencil
Scissors or utility knife
Heavy duty sewing machine or leather hand sewing needle
Backing material
Invisible quilting thread
Knitting needle or chopstick
Liquid seam sealant

It may not be politically correct to wear the fur coat your grandmother left you in her will, but you certainly don't want to simply throw it away or give a family heirloom to a thrift store. Instead, turn that coat into a blanket. It's a fashionable way for your family to use the fur coat for generations to come. Even damaged coats can find new life as a blanket.
How to Turn a Fur Coat into a Blanket
Step 1
Make sure the fur coat (or coats) you'll be using are clean. If they're a bit musty or appear to be less than fresh, take them to a professional fur cleaner before you begin.
Video of the Day
Step 2
Cut apart the coats to create the largest possible sections of fur. This will give you the greatest range of design possibilities. Getting to the seams to remove the lining of the coat may require cutting into the lining first.
Turn the coat inside out and pull the lining away from the fur. Carefully make a small cut into just the lining, then use this opening to remove the bulk of the lining in that area, along with any other shaping materials that were used in the jacket. This should give you access to the inside of the seams, where the fur and lining are attached. Use a seam ripper to carefully undo the seam and remove the remaining lining.
Step 3
Determine the size and layout of your fur blanket. The size and condition of the coat (or coats) will determine how large a blanket you can make and how best to piece it together. Like a pieced quilt, there are many design options. Remember that simplest is best.
You'll find that the coat itself was made from strips of fur, rather than a single piece of pelt. You can use this design element in your blanket top by cutting large blocks and rotating them 90-degrees from one another. Or you can integrate wide strips of a contrasting fur to make your blanket, if you're using more than one coat.
Whichever design you choose, make certain to plan it carefully and ensure you have enough material to accomplish it.
Step 4
Measure and mark your blanket top pieces. Use a straight edge (a quilting straight edge with a ruler is perfect for this) or a yardstick to measure and mark your fur into the appropriate pieces, on the leather side, with a fabric marking pencil.
Step 5
Cut fur into the appropriate pieces for your design. There are scissors designed specifically for leather cutting, or if you have a pair of heavy duty, sharp scissors they may work as well. However, using a utility knife and your straightedge, to cut your blanket top pieces, is preferred. With the utility knife, cut only through the leather of the fur; this will minimize damage to the hair.
Apply a liquid seam sealant to any seams you've cut from the original coat.
Step 6
Sew the pieces together, starting from one edge of the blanket design to the other. Use either a heavy duty sewing machine with a needle and thread appropriate for sewing through leather, or hand-sew with a leather needle
Step 7
Sew your backing material to the blanket top, right sides together, either by hand or with a heavy duty machine. Leave 1/4 of the fourth side open and turn the blanket right side out through that opening. Then hand-sew the opening closed, turning the edges in as you go.
Step 8
"Quilt" the blanket to affix the top to the bottom of blanket, using invisible quilting thread. This, again, is a design choice and will be as unique as your blanket itself. "Stitching in the ditch," the term used by quilters to signify sewing through the top and bottom of a blanket along the seams of the blanket top, is your best bet. However, you may choose to hand-stitch only at a few junctions of the blanket top pieces or along every seam. Either way, the purpose is to keep the backing of the blanket attached to the top.
Step 9
Finish the blanket by gently pulling any trapped fur out of the seams, using a knitting needle or chopstick.
Tip
Don't forget to use the fur from arms of your coat; remove the lining and then separate one seam lengthwise up the arm.
For longer-haired furs: Once you have sewn all of the seams of your blanket top pieces, trim the hair from the leather on the underneath side of the blanket top to help remove some of the bulk at the seams.
If you're using scissors to cut the fur, pull the hair away from either side of the cut line, in order to minimize damage to the fur.
Be sure to check the direction the fur lays when piecing your blanket top together.
Video of the Day