Things You'll Need
Cube shelf
2 keyhole hangers
4 #8 flathead screws
2 wall-mounting screws
Drill and drill bit
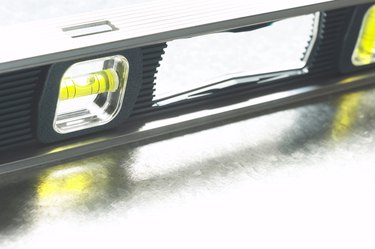
Level
Flathead screwdriver
Marking utensil

A cube shelf can be an interesting, modern and functional addition to your wall. The box-shaped shelf has an open front and back so that you can place items to display inside or on top of the cube. Following the proper steps for hanging your cube shelf will ensure that the finished product is stable and secure.
Step 1
Assemble your cube shelf, following manufacturer's instructions. Once assembled, lay the shelf face down on a flat surface so that the shelf's unfinished back edge is pointing up, toward you.
Video of the Day
Step 2
Determine which of the cube's sides you want to be the top of the shelf (any side can be the top, but make sure you keep it consistent). Measure down one inch from the top left corner. If there are any wood joints within a half inch, move down another inch so that when you drill you won't split the wood or ruin the joints of the shelf. Mark the point on the piece of wood with a marking utensil, and then, using your level and measuring tape, mark the same spot down from the top right corner of your shelving unit.
Step 3
Find a drill bit that is wider in diameter than the head of your wall-mounting screw, and drill a hole into the wood at the marks that you've just made. Drill the hole about 1/2 inch deep, but no more.
Step 4
Place your keyhole fasteners over the holes on the back edge of your wood. The keyhole fasteners are designed as a longer piece of metal with two screw holes on either end. In the center is a larger hole and a slit pointing upward from the hole. You place a screw's head into the large hole, and then slide it up the slit so that it can no longer fit out of the fastener, and it secures the wall mounting screw in place. Once you have the fasteners in place (with the large hole toward the bottom, and the slit pointing toward the top of the shelf), use the four #8 screws to screw the two fasteners into place (two screws each).
Step 5
Determine where on your wall you want to hang the cube shelf. A friend may be necessary at this point to help you hold and mark the wall for reference. Place the cube along the wall and mark where the top two corners are. Take the shelf down and lay it flat on its face again.
Step 6
Measure the distances (from the top and the sides) from the edge of the shelf to the center of the keyhole fastener. Make notes of all of these measurements for both fasteners, and relay those measurements to the wall. Mark down and over from the previously made marks to where the fasteners are going to be.
Step 7
Drill a wall mounting screw into the new marks. Make sure that the screws are secure with a stud, or that you have a screw with an anchor on it to secure it to the wall. Use your level again to make sure that the second screw is going to be level with the first drilled screw and drill it in. When drilling these screws in, make sure to only screw them in part of the way. Leave them hanging out of the wall about 5 mm. They need to be sticking out to be able to catch the fasteners and hold them.
Step 8
Slide your cube shelf onto the wall, placing the metal fasteners onto the wall screws. When placed properly, gravity and the weight of the cube shelf will slide the screws into the slots above the large fastener holes and hold the cube in place. Check the cube's level and adjust it accordingly if necessary.
Tip
This tutorial is only for lightweight cube shelves. If your shelves weigh more or are going to be displaying heavier objects, further fasteners on the bottom two corners may be a good idea. It isn't necessary, but simply for added security.
If your store-bought cube shelf comes with manufacturer's instructions for wall hanging, use them.
Video of the Day