Things You'll Need
Pressed flowers
Cardboard
Paper
Stack of heavy books
Clear fingernail polish
Craft glue

There are three common methods of flower preservation: hanging, pressing and drying. Pressing is the only method where the flowers lose their three-dimensional shape and are rendered flat, lending them perfect form for decorating numerous surfaces including stationary, mirrors or pendants for jewelry. Pressed flowers can be enhanced and further preserved by applying clear fingernail polish. The polish solidifies the flower, hardening the petals and producing a shine while working with the glue to hold the flower to the decorative surface.
Step 1
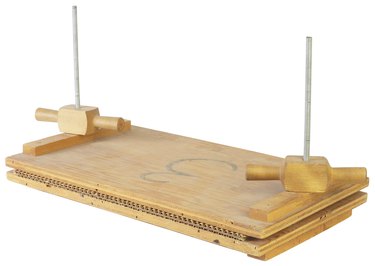
Obtain a flower press or build one yourself. You can build one out of 3 to 5 equally sized and shaped pieces of cardboard, sheets of paper of the same size and number and a stack of heavy books. Alternate in a stack: cardboard, paper, cardboard, paper, and end with the stack of heavy books on top.
Video of the Day
Step 2
Place the flowers into the press. The flowers should rest atop the cardboard and under the paper in layers. None of the petals or stems should touch or they may become pressed together. Time in the press varies, but generally takes between two weeks and one month. It will not hurt the process to disassemble the press and check on the flowers. You can speed up the preservation by placing the entire flower press near a light bulb or other non-flammable heat source.
Step 3
Remove the flowers carefully as dried flowers are often brittle. Apply a dab of craft glue to the back of the flower. Place the flower onto the surface you wish to decorate. Allow to dry for at least one hour.
Step 4
Paint a coat of clear nail polish over the flower outward 1/4 inch or more. Allow to dry. Apply a second coat and allow it to dry overnight. The result is shiny, colorful pressed flowers that will stay that way for years to come.
Tip
Flowers that lend themselves exceptionally well to pressing include: daisies, roses, pansies and poppies.
Video of the Day