Things You'll Need
Adjustable wrench
Pliers
Screwdriver
Small pipe wrench
Small paintbrush
Basin wrench
6-inch length of 1/8-inch brass nipple
Cotton string
Pipe dope or oil paint
Plumbers tape
1/8-inch brass elbow
1/8-inch universal brass coupling
New hose
Counterweight coupling

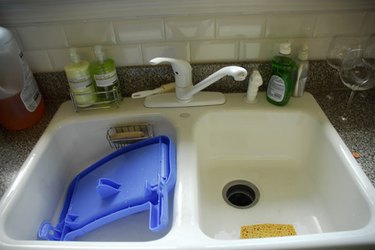
Adding a kitchen faucet sprayer to your kitchen sink is relatively easier and less expensive than installing a new sprayer-spout faucet. It should take no longer than an hour from start to finish. Before starting, check the sink to ensure it has an extra hole near the faucet. This should be closed with a stopper that unscrews or pops off.
Step 1
Turn off the water supply valves below the sink and allow remaining water to drain from the faucet.
Video of the Day
Step 2
Examine the underside of the current faucet. If it has a pipe leading from it with a cap on it, you will be able to easily install the faucet sprayer. If it does not, you may need to replace the faucet.
Step 3
Install the sprayer-hole flange by inserting the flange from the top and screwing the plastic companion nut from below. The sprayer flange is a circular object with a hole in the center that protects the hole the sprayer hose slides through and provides a resting spot for the sprayer when not in use. The flange should have two parts; one part sits in the hole on top the counter and the other part screws onto the first part from below the counter and holds it in place.
Step 4
Using the adjustable wrench, unscrew the female cap from the end of the pipe or unscrew the entire male pipe from the underside of the faucet.
Step 5

Wind cotton string around the male threads at the ends of the new pipe. Apply pipe dope or oil paint to each male end of the pipe fittings as you assemble them.
Step 6
Screw the universal coupling into one end of the new pipe and the U-joint into the other end.
Step 7
Tighten all fittings tightly using the basin wrench in a clockwise motion.
Step 8
Secure the elbow, making sure it is facing toward the side of the sink where the sprayer hose is installed.
Step 9
Insert the male end of the new hose through the hole on the top side of the sink.
Step 10
Wrap the male end of this flexible hose with plumbers tape--or use the cotton string and pipe dope--and screw it onto the elbow or U-shaped joint. Use the adjustable wrench to tighten this hose onto the pipe in a clockwise direction.
Step 11
Install the sprayer handle to the top part of the hose above the sink, if it is not pre-installed.
Step 12
Pull the hose down below the sink, and attach the hose counterweight to the lowest portion of the hose. Test this by pulling the sprayer out and allowing the counterweight to pull the hose back into the hole.
Step 13
Turn on the water supply valves below the sink and test your new sprayer. Tighten any pipes that leak. Dry them off and apply more pipe dope at the insertion points. If leakage persists, start over.
Video of the Day