Things You'll Need
Shovel
Measuring tape
4-by-4-foot post, 4 feet long
Wooden stakes, 1 package
Hammer
String
1 roll 14-2 gauge ROMEX® direct burial (UF) cable, 50 feet
Wire cutters/strippers
1 section conduit, 8 feet
Hacksaw
Pipe bender
1 outdoor electrical junction box kit
2 wire clamps

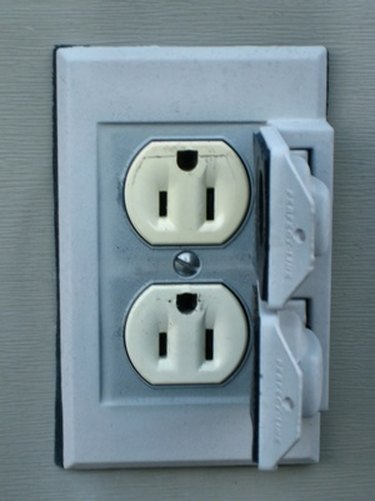
Installing an outlet in the yard will not only add the convenience of quick access to electricity, but help eliminate the need for dragging those cumbersome extension cords around. You will need to use electrical cable that is rated for underground burial and conduit on both enter points to protect the wiring. Wrap up the project by tying the cable into an existing outdoor outlet.
Step 1
Locate the area in the yard where the outlet will be placed. Dig a 3-foot hole with the shovel; place the 4-by-4 post in the hole and bury the post with 1 foot extending up from ground level.
Video of the Day
Step 2
Run stakes every 10 feet from the location of the post to the nearest outdoor outlet on the home. Hammer the stakes into the ground so about 10 inches remain above ground level. Tie the string to each stake to indicate the route to dig the trench for the cable.
Step 3
Dig an 18-inch-deep trench following the guide of the string.
Step 4
Turn off the power to the existing outdoor outlet. Using the screwdriver, remove the screws holding the cover and set the cover aside. Remove the top and bottom screws on the outlet and pull the outlet out of the box as far as you can while leaving the wiring intact. Using the screwdriver, knock out one of the knockout holes in the bottom of the junction box. If the hole has a plug that unscrews, use the screwdriver to remove the plug.
Step 5
Measure and cut a section of conduit to 4 feet long. Using the pipe bender, bend a 90-degree bend in the center of the 4-foot piece of conduit. Attach the wire clamp to one end of the conduit. Attach the conduit and wire clamp to the hole in the bottom of the wall outlet.
Step 6
Feed one end of the ROMEX® cable up through the conduit and pull 6 inches out through the hole in the bottom of the outlet box. Strip 6 inches of the outer insulation off the cable and strip 1 inch of insulation off the wires inside. Connect the bare wire to the green screw on the outlet. Connect the black wire to the brass screw on the bottom side of the outlet and the white wire to the silver screw on the bottom side.
Step 7
Push the wiring back into the junction box and tighten down the screws to hold the outlet in place. Replace the cover and tighten it down with the screws and screwdriver.
Step 8
Route the cable in the trench over to the post. Mount the new outlet junction box on the trench side of the post, 2 inches from the top. Attach it using the included screws. Knock out or unscrew the plug in the bottom of the box.
Step 9
Cut a second piece of conduit that is 4 feet long and bend a 90-degree bend in the center with the pipe bender. Attach the wire clamp to one end of the pipe and then attach the pipe to the junction box.
Step 10
Repeat Steps 7 and 8 to connect the end of the wiring to the new outlet in the outlet kit.
Step 11
Fill in the trench with the dirt and turn the power back on to the outlet. Plug in a light to the new outlet and test for power.
Warning
Do not attempt to work on or add any additional electrical lines to a circuit without first turning the power off.
Contact a licensed electrician if you have any questions before beginning this project.
Video of the Day