Things You'll Need
Marking gauge
Pencil
Bevel gauge
Combination square
Backsaw or dovetail saw
Chisel
Marking knife

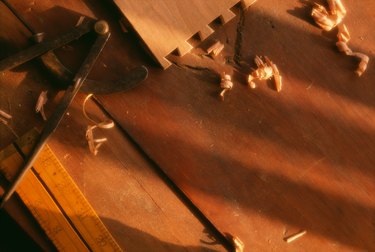
It's pretty easy to set up a jig and cut a series of perfectly fitting dovetails. What about when you don't have a jig to use? Then, it's time to turn to the centuries-old technique of hand-cutting a dovetail joint. It only takes a moderate set of hand tools and careful layout to ensure success. You may just find yourself using this method from now on, when your woodwork calls for a dovetail joint.
Step 1
Mark the thickness of each piece on both faces of the boards using a marking gauge or a pencil and combination square. Designate one board as the pin board on the other as the tail board. A quick way to do this is to simply write "pin" or "tail" on the end of each board.
Video of the Day
Step 2
Measure the center of the width of the pin board. Mark the center on the end of that board. Measure out from the center point, 1/2 inch on each side and make a mark. Draw a 6-degree line from each mark, using a bevel gauge. Make sure the bevel lines are drawn in the same direction.
Step 3
Saw just on the outside of these lines straight down to the thickness mark you made earlier with the marking gauge. Use a fine-toothed backsaw or dovetail saw for this. Cut the waste wood form the shoulders of the board by clamping it on its side and sawing straight down slowly until the waste falls off.
Step 4
Lay the end of the pin board down on the face of the tail board right at the line you scribed earlier. Make sure the larger end of the pin faces inward. Trace the pin to the face of the tail board using a sharp pencil or marking knife. Continue these lines on to the end of the tail board with a combination square and a pencil or marking knife.
Step 5
Saw on the inside of these lines down to the thickness line scribed earlier. Lay the piece down and secure it to the bench. Chop out the tail waste with a sharp chisel and mallet. Chop halfway through, then flip the board over and chop out the other half. Clean up any remaining bits with a small chisel.
Assemble the two pieces and glue and clamp to secure.
Tip
Cutting or "scribing" all of your layout lines instead if using a pencil will make a reference point for your hand tools to land. This will make it easier to saw or chisel right to the line instead of going over it accidentally.
Video of the Day