Things You'll Need
Step ladder
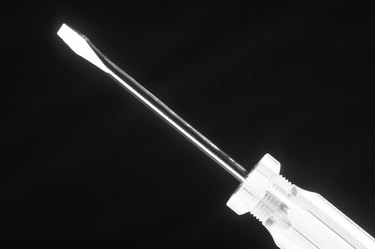
Screwdriver
14½-by-14½-by-¾-inch plywood
Wood glue
Two pieces of 2-by-4-by-14½-inch lumber
Variable speed drill
Phillips-head screw tip
3-inch drywall screws
1-inch paddle bit
Wire nuts
Electrical tape

When replacing recessed lighting with flush-mount lighting, the most important issue is what to do with the hole in the ceiling left behind by the recessed lighting fixture. In most cases, a flush-mount light fixture will cover the hole occupied by the recessed fixture. Whether or not you patch the hole with new drywall, tape and joint compound, or some other method, the idea is to seal the space between the room and the attic. As in any electrical project, check local codes to be sure you can do this without hiring an electrician.
Step 1
Locate the breaker that supplies electricity to the recessed lighting and switch it off. Place the step ladder under the recessed lighting.
Video of the Day
Step 2
Remove the cover and light bulb. Back the screws holding the cover plate over the electrical connections out with the screwdriver and remove the cover plate.
Step 3
Locate the screws securing the wiring to the recessed light fixture. Turn them in a counterclockwise direction until the wires can be removed from the fixture. Inspect the recessed fixture to see if it can be removed from inside the room. If so, back the screws out and pull the fixture from the ceiling. If not, climb into the attic and locate the recessed fixture.
Step 4
Locate the screws in the brackets holding the fixture to the ceiling joists. Back the screws out with a screwdriver and remove the fixture from the hole.
Step 5
Place the plywood between the ceiling joists over the hole made for the recessed light. Apply wood glue on the plywood where it meets the ceiling joists.
Step 6
Place the two 2-by-4s on top of the plywood (and glue) and secure them to the ceiling joists with the drywall screws. Drill a hole in the center of the plywood with the 1-inch paddle bit and feed the electrical wires through the hole. Climb down out of the attic.
Step 7
Insert the ends of the white wire from the ceiling and the white wire from the flush-mount fixture into a wire nut and turn the nut until it is tight. Repeat this with the black wire.
Step 8
Secure the flush-mount light fixture to the ceiling according to the manufacturer's instructions. Install the bulb and the cover. Turn the breaker back on.
Tip
Walk carefully in the attic and place your feet on the ceiling joists to prevent breaking the ceiling drywall.
Wrap the wire nuts with electrical tape to add insulation to the connections.
Warning
Do not work with live electricity.
Do not leave tools unattended in the presence of children.
Video of the Day