Things You'll Need
Eyelash yarn
3/8-inch grosgrain ribbon
Drinking straw
Tape

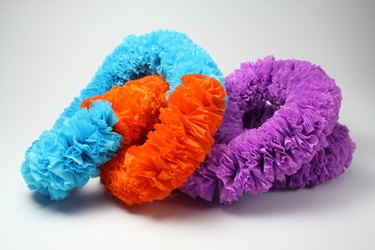
A Hawaiian lei is a beautiful piece of art, originally (and still mostly) created on the Hawaiian islands. These leis can represent many things to many people, but are always full of symbolism and meaning. While traditionally these leis are made from flowers, stunning versions can also be made from yarn. There are many advantages to this. You'll have a beautiful lei that will last a lifetime, instead of wilting away; the materials are often much more economical to procure; and the lei can be made in (and withstand) even the coldest of climates.
Step 1
Cut your ribbon to the appropriate length. This should be slightly longer than the size of the finished lei--you're adding length to be able to knot it later.
Video of the Day
Step 2
Push the end of the ribbon all the way through the straw. Securely tape the ribbon tip to the outside of the straw.
Step 3
Tie the yarn to the opposite end from which the ribbon is taped. This should be the side with the majority of the ribbon hanging from it.
Step 4
Wrap the yarn around the straw. This should form spirals around the straw, about five or so winding from the knot. Do not wrap these excessively tightly; you'll have to push them down the straw.
Step 5
Push the yarn spirals down toward the knot. This should cause the yarn to bunch up around the knotted end of the yarn.
Step 6
Push this bunch of yarn over the knot and onto the ribbon.
Step 7
Keep performing Steps 4 to 6 until the ribbon is completely filled with bunches of yarn.
Step 8
Tie the ends of the ribbon into a secure knot. Your lei is now ready to be worn.
Tip
Always make sure to follow the instructions on your yarn when it comes to washing and care of your lei.
Video of the Day