Things You'll Need
Fabric
Spray starch
Monogram design
Wash-away foundation paper
Printer or pen
Stabilizers (wash away or tear away)
Washable spray base adhesive
Hand embroidery hoop
Brother foot “N”
Embroidery needle
Embroidery thread
Bobbin white embroidery thread
Spray bottle with water
Scissors

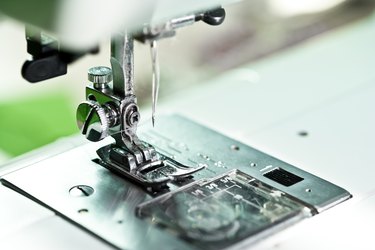
The Brother sewing machine can create monograms with its monogram foot, #N. Use the monogramming foot with free motion sewing to create the monogram. The monogram foot is wider than most machine feet and has a see-through window to view stitches. The bottom of the foot has a cut-out section to allow the stitches to flow through easily. The monogramming foot is also used for decorative stitches, hemming, smocking, eyelets, scallops and heirloom stitching.
Step 1
Prepare the fabric by machine washing and do not add fabric softener, then machine dry. Starch the fabric on the wrong side.
Video of the Day
Step 2
Transfer the monogram design to the foundation paper by printing with a printer or hand drawing with a pen.
Step 3
Create a sandwich by spraying the stabilizer with spray base adhesive, lay the fabric on top of the stabilizer and press together with your fingers, then add the wash-away foundation paper on top. Place the outer embroidery hoop on the table, lay the fabric sandwich over the embroidery hoop with the foundation paper on top, set the inner hoop on top of the fabric and snap hoop together and tighten the hoop screw. The fabric should be on the bottom of the hoop; this is the reverse of hand embroidery.
Step 4
Remove the presser foot, then raise the presser foot lever and place the hoop under the needle. Set up the Brother sewing machine by attaching the monogramming foot #N onto the machine, insert the embroidery needle, thread the machine with the embroidery thread and insert the bobbin with the bobbin white thread.
Step 5
Align the needle to the starting position. Turn the needle down by hand at the beginning of the first letter and sew two very small stitches, then back stitch over them to lock the stitches in place.
Step 6
Drop the feed dogs on the Brother sewing machine. Change the stitch to a zigzag, set the width to 2.5mm to 7mm or wider, set the length to .0 to .2, very short.
Step 7
Sew slowly and guide the hooped fabric with your hands over the first letter on the foundation paper. You are sewing free-motion style when the feed dogs are dropped, which means you guide the fabric under the needle instead of the machine guiding the fabric. Back stitch two stitches at the end of the letter to lock the stitching.
Step 8
Move the hoop and align the needle to sew the next letter and repeat the same process.
Step 9
Remove the monogramming foot when you have finished the monogram. Take the hoop out and remove the fabric from the hoop. Cut or tear away excess foundation stabilizer from the bottom, and spray the wash-away foundation paper with enough water to dissolve. Snip the threads with scissors on the top between letters and from the bottom.
Tip
Set up a practice fabric sandwich and check the stitch width and length. Adjust the tension setting. Don’t forget to reset the feed dogs.
Warning
Whenever dropping the feed dogs for free-motion sewing, move the fabric with your hands, if you don’t, the machine will stitch in the same place and will cause threads to mound up on the top and get caught on the bottom in the feed dogs and bobbin case.
Video of the Day