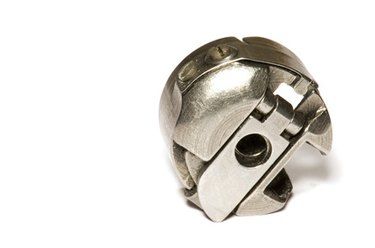
An improperly inserted bobbin will cause uneven and weak stitches, plus the lower thread of an improperly inserted bobbin can become knotted, jam up, and can even damage the inner workings of a sewing machine. Inserting the bobbin in a Kenmore Sewing Machine, like the 158 Model series, requires a certain amount of precision, but following the steps in order, will simplify the process. The 158 is a free-arm model, so the accessory box will need to be removed by lifting up on the front end of the machine's arm before a bobbin can be inserted.
Step 1
Open the bobbin shuttle's cover. It is the rectangular piece right behind the accessory box.
Video of the Day
Step 2
Place your hand at the top of the hand crank at the right side of the machine, and turn the hand crank toward your body until the needle reaches its highest position.
Step 3
Catch the end of the hinged bobbin case latch with your fingertip, and swing the latch open. Hold the latch while you pull the bobbin case straight out of the machine's shuttle.
Step 4
Slide the threaded bobbin into the bobbin case, making sure the bobbin turns clockwise inside the case.
Step 5
Slide the free end of the thread into the slotted edge of the bobbin case, and then under the tension spring.
Step 6
Hold the bobbin in the case with your fingertip while lifting the hinged latch. The bobbin will be locked in place when the latch is open unless the case is damaged.
Step 7
Slide the case straight into the shuttle until you feel the case click into place, then release the latch. Releasing the latch should lock the bobbin case in the shuttle, if it does not, you will need to try again because using a machine with a loose bobbin case will usually ruin a sewing machine.
Tip
Never turn the hand crank away from you or you can jam the machine and cause damage.
These bobbin insertion directions, while written for the Kenmore Model series 158, apply to almost all machines that operate with separate bobbin cases.
Video of the Day