Things You'll Need
3 Oak Step Blanks
Flexible curve ruler
Pencil
Band saw
Disc sander
Router with 1/2-inch round-over bit
Stairway
Hammer
1 box of 2-inch finish nails
2 3-step oak stringers
3 Oak risers
Wood finish of your choice

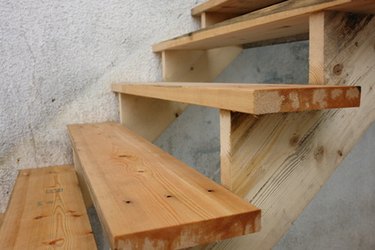
Rounded wood steps add a decorative element to a basic set of stairs. The graceful curves of rounded wood steps are suitable for many interior designs. It can be difficult to find the parts to create rounded wood steps in stores, so an option is to make them yourself. If you make them yourself, you can match the wood and finish of your existing woodwork.
Step 1
Place the three step blanks on a work surface. Create the curve for the rounded steps on the flexible curve ruler. Place the flexible curve ruler on each front corner of the step blanks. Mark the curve with a pencil.
Video of the Day
Step 2
Cut out the curves using a band saw. Sand the curves on a disc sander, until you are satisfied that the curve is smooth. Use a router with a 1/2-inch round-over bit to round the edges of the steps. Round both the top and bottom edge of the steps on the sides and front of the step blanks. Leave the back side square.
Step 3
Place the two stringers on either side of the stairway. Nail the stringers to the boards at the top of the stairway, using a hammer and finish nails. Fasten the stringers to the sides from the top to the bottom of the stairway, using a hammer and finish nails. Space the nails evenly every six to eight inches.
Step 4
Align the rounded wood steps on top of each step support of the stringers. Fasten the steps in place, using a hammer and finish nails. Place the risers underneath each step. The riser rests on the front face of the stringers between the bottom edge of the step above and on top of the back edge of the step below. Fasten the risers in place, using finish nails and a hammer. Space the nails every six to eight inches apart.
Step 5
Apply a wood finish of your choice. Allow the wood finish to dry before walking on the rounded wood steps. Refer to the instructions on the wood finish container for drying times.
Tip
Use a different material for the rounded wood steps than the rest of the stair parts to accent the graceful curves of the steps.
Warning
Wear eye protection when working with wood. Follow tool safety precautions for safe operation.
Video of the Day