Things You'll Need
High-pressure propane regulator (0 to 10 psi)
3/8-inch to 1/8-inch male-to-female bushing
3/8-inch to 3/4-inch iron bell reducer
3/4-inch-diameter iron pipe, 2 feet long
3/4-inch to 1-inch iron bell reducer
1-inch-diameter threaded iron pipe nipple, 2 1/2 inches long
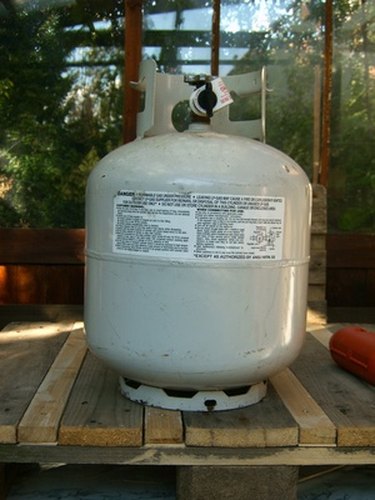
Propane tank
Leather gloves
Clamps
Electric drill
1/8-inch drill bit
Drill or tap oil
Tape measure
Spark striker
Thread-seal or plumber's tape

Removing weeds from your lawn or garden can be tedious and difficult, and you often must repeat the procedure throughout the growing season. Many chemical weed-killers are available, but their warning labels show they can endanger people and animals and damage desirable plant life as well as weeds. Flame weeders provide an alternative, using a jet of intense flame to burn weeds to their roots. You can make your own flame weeder at home.
Drilling Air Intake Holes
Step 1
On a 2-foot-long threaded iron pip, measure a point 1 inch down from where the threading stops on one end, and mark the point with a pencil. Along the same line, mark a point a half-inch below the first point and another point an additional half-inch below the second point.
Video of the Day
Step 2
Clamp the pipe securely to a workbench or table so that the three marked points face straight up. Place a piece of scrap wood underneath the pipe before clamping it to avoid damaging the workbench surface while you drill out the intake holes.
Step 3
Fit a 1/8-inch drill bit into an electric drill and apply tap oil to the bit. Bore a hole straight through the first point you marked and on through the bottom of the pipe, creating identical holes on either side of the pipe. Go slowly to prevent overheating the bit. Take a break when the oil smokes to let the bit cool off.
Step 4
Repeat the drilling process for the two other marked points. You should get three holes on each side of the pipe, or six holes in all.
Assembling Pipe Fittings
Step 1
Wrap a small amount of thread-seal tape around the threaded brass male reducer on the end of the hose of the propane regulator. Thread the female side of the 3/8-inch to 1/8-inch male-to-female reducer onto the male reducer on the hose.
Step 2
Wrap a small amount of thread-seal tape around the outside of the 3/8-inch male end of the 3/8-inch to 1/8-inch reducer and thread the female end of the 3/8-inch to 3/4-inch bell reducer onto it.
Step 3
Wrap a small amount of thread-seal tape around the threaded male end of the 2-foot-long 3/4-inch iron pipe on the opposite end from the air intake holes. Screw the male end of the 2-foot pipe into the female end of the 3/8-inch to 3/4-inch bell reducer.
Step 4
On the end of the 3/4-inch-diameter pipe near the intake holes, screw on the female end of the 3/4-inch to 1-inch bell reducer. Thread the 1-inch-diameter, 2 1/2-inch-long iron pipe nipple into the 1-inch end of the iron bell reducer fitting.
Using the Flame Weeder
Step 1
Screw the high-pressure regulator onto the propane tank's regulator. Turn the valve on the tank to the "On" position, and adjust the propane regulator to about 6 psi.
Step 2
Hold the flame weeder at the opposite end from the torch head, which is the 2 1/2-inch threaded nipple. Hold a spark striker to the torch head and strike a spark until the torch lights.
Step 3
Expect to see a large, conical jet of flame. If you cannot get the flame to light or the flame is inconsistent, adjust the pressure regulator until enough propane comes out of the torch to light the flame. Adjust the pressure further to produce a consistent, cone-shaped jet. Use trial and error to learn the proper propane pressure for your flame weeder, and mark that point on the regulator so you will know next time.
Step 4
Fire the jet of flame at the root and stem of a weed for a few seconds to eradicate the root system and destroy the weed.
Tip
The burner relies on an even mixture of oxygen and propane near the tip of the torch head. Try drilling more air intake holes for a better mix of oxygen and propane if you cannot get a consistent jet of flame. Remove the entire assembly from the propane gas line before drilling additional holes.
Warning
This project involves flammable gases at high pressure,so take extreme care to avoid explosions, burns and other injuries. Check all fitting seams for gas leaks. Do not operate the weeder if the fittings appear damaged or corroded or if you detect a leak. Always wear thick leather gloves and eye protection to keep you safe from flying debris and high temperatures. If your torch is too hot to touch at the end opposite from the flame, it is operating at an unsafe temperature. Allow the torch to cool to room temperature before storing it. Never attempt the flame-removal of weeds during high-risk periods for forest and brush fires. Do not use the flame weeder for anything but weed removal.
Video of the Day