Things You'll Need
Kool-Aid
Water
Small bowls
Spoon
Shirt
Rubber bands
Brown paper bags

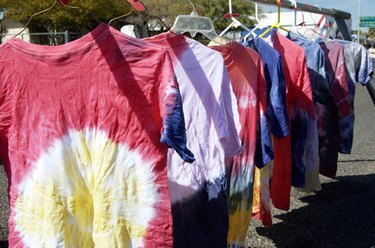
Tie-dyed shirts first became popular in the 1960s and have not gone out of style. Scout troops and 4-H groups often use Kool-Aid as a dye for shirts and other garments. Kool-Aid is non-toxic and safe for children. Kool-Aid is available in a variety of colors, including blue, purple, red, orange and yellow. Bright colors will give the dyed shirt the classic look of tie-dye.
Step 1
Mix together one package of Kool-Aid with one cup of water in a small bowl. Stir until the Kool-Aid is dissolved.
Video of the Day
Step 2
Pinch together or twist sections of the chosen shirt and wrap the section with a rubber band. You can do this with multiple sections of the shirt to create the tie-dyed look.
Step 3
Soak the banded section into the first color choice. Allow the material to soak until the desired color is achieved.
Step 4
Continue the process by soaking the other banded sections of the shirt.
Step 5
Set the freshly dyed shirt on a brown paper bag to drain off any excess liquid.
Step 6
Remove the rubber bands, flatten the shirt and allow to air dry.
Tip
Wool, silk or nylon take well to Kool-Aid dye. Other materials will fade more quickly with multiple washings.
The longer you allow the shirt to soak in a color, the more vibrant that section will become.
For pastel colors, simply add additional water to the Kool-Aid until the softer color is achieved.
Warning
As with any home-dyed fabric, garments tie-dyed with Kool-Aid should be washed separately from other clothes for the first three or four washings. This keeps the colors from bleeding on other clothes in the washer.
Video of the Day