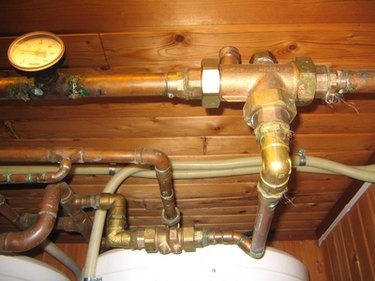
Things You'll Need
Bucket
Copper pipe
Tubing cutter or hacksaw
File
200-grit sandpaper
Acid flux
Flux brush
Torch
Solder
Threaded female copper fitting
CPVC pipe
Threaded male CPVC fitting
CPVC solvent
CPVC glue
Plumber’s tape

For most homeowners, plumbing with CPVC pipe is easier than using copper. CPVC is also less expensive than copper pipe for repairs and remodeling. There is no reason to feel stuck with copper for future plumbing, even if that is currently what carries all of the water in your house. Joining CPVC to your existing copper plumbing isn't complicated or expensive. You should be able to complete the new connection in less than an hour.
Step 1
Turn off the water to the house, or to the area where you will be connecting the CPVC pipe to an existing copper pipe. Have a bucket ready to catch the water that will run out when you cut the water pipe.
Video of the Day
Step 2
Cut the copper pipe to the desired length with a tubing cutter. Place the pipe into cutter, tighten the clamp and rotate the cutter around the pipe. Tighten the clamp and rotate the cutter again, continuing in this manner until the pipe is cut through. The cut can also be made using a hacksaw, but the cut must be made at a 90-degree angle and the cut end must be smoothed with a file to remove any small shavings.
Step 3
Sand the last 2 inches of the copper pipe with sandpaper until the surface is uniformly scuffed. Sand the inside of the copper female fitting in the same fashion. Scuffing these surfaces cleans the copper and creates a rough surface for better solder adhesion.
Step 4
Apply acid flux with a brush to the sanded surfaces of the pipe and the fitting. Slide them together.
Step 5
Heat the collar of the female fitting with a torch and hold a length of solder against the opposite side until it melts into the joint. Allow the joint to cool to room temperature.
Step 6
Cut your CPVC pipe to length with a CPVC cutter (a scissors-type tool) or a hacksaw. If you use a hacksaw, the cut must be made at a 90-degree angle to the pipe and the end must be smoothed with sandpaper to remove any small shreds of plastic.
Step 7
Clean the outer end of the pipe and the inside of the male fitting, using solvent.
Step 8
Apply a thin, even layer of CPVC glue to both cleaned surfaces, using the applicator provided in the can. Insert the pipe into the male fitting, using a twisting motion. The pipe must be fully seated in the fitting for a leak-proof fit. Allow the glue to cure for at least five minutes before stressing the joint.
Step 9
Wrap two layers of plumber's tape around the threaded end of the male fitting.
Step 10
Insert the threaded male CPVC fitting into the threaded female copper fitting and tighten. Be careful not to overtighten the fitting.
Tip
Always allow sweated copper fittings to air-cool. Quenching them in water can stress and crack edges or joints.
A union can be used instead of threaded fittings when joining CPVC to copper. This is advisable when attaching plumbing to a water heater or other situations where future disconnection is likely. When attaching plastic to metal threaded fittings, always use a plastic male fitting with a metal female fitting to prevent stress fractures in the plastic.
CPVC compression fittings are also available for in-line connections when adding a new service to an existing line.
Warning
Avoid eating, smoking, or any other hand-to-mouth contact while soldering copper or using CPVC solvent and glue. Wash your hands thoroughly when you are done.
Wear eye protection while handling solvents and soldering.
Use solvents only in a well-ventilated area or when wearing an approved respirator.
Video of the Day