Things You'll Need
Medium-grit sandpaper
Fine-grit sandpaper
Clean, dry cloths
Wood stain
Paintbrush
Waterproof polyurethane
Whitewash stain
Bead board
Circular saw
Wood glue
Fabric
Punched tin
Chicken wire
Wood screws
Countertop
Interior latex paint

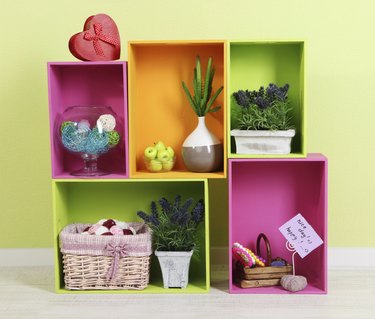
Rustic is the theme of the day if you're decorating with wooden crates. Achieve a variety of design styles both inside and outside your home using these genuine, old treasures. You can use a variety of ways to refinish and repurpose these wooden catchalls that have so much character. Whether you sand and paint them to create front porch storage, add wheels to make a mobile nightstand, or mount them on the wall to hold boots and umbrellas in the mud room, wooden crates are versatile enough to fit into almost any decor -- once you decide how to refinish them.
Step 1
Sand your wooden crate with medium-grit sandpaper, followed up by a go with fine-grit paper. Wipe away the dust and apply an attractive wood stain that matches the trim in your room. Once your stain has dried completely, add one-to-two coats of waterproof polyurethane to make your finish stain-resistant. Follow this treatment to make a crate that will be usable both indoors and out -- as a plant stand, a rustic rack to hold magazines or stacked in a loose configuration on the porch to display fall decor such as pumpkins and gourds.
Video of the Day
Step 2
Whitewash your wooden crates by applying a single coat of whitewash stain. According to home improvement expert Ron Hazelton, this technique works well on pieces constructed of pine. Apply the stain with a paintbrush, wait several minutes, and then use a clean, dry cloth to work the stain into the wood. Use this technique to make primitive cabinets to hold Depression glass in a shabby-chic-style kitchen, a romantic shelf to display vintage doilies in a Victorian bedroom, or even as extra storage for paper supplies in a country bathroom.
Step 3
Cut a piece of bead board to fit inside the bottom of your wooden crate using a circular saw. Use wood glue to fasten it into place, and then hang your crate on the wall to hold cookbooks in the kitchen or an assortment of succulents in the entryway. Experiment with affixing different materials to the bottoms of your crates to achieve various looks: vintage wallpaper applied to photographic mount board -- sometimes call mat board -- gathered fabric or even sheets of punched tin or chicken wire.
Step 4
Turn your wooden crates into furniture by affixing them firmly together with wood screws and glue and then adding a countertop of butcher block or glass. Position the crates on their sides with the open ends facing out to create shelving. Use this idea to create an affordable kitchen island that stores all your pots and pans or a dining room buffet that holds all the holiday china. Paint your finished base of crates with an interior latex paint that matches your decor before adding your countertop.
Tip
Think beyond storage when decorating with wooden crates. These affordable catchalls make bedside stands, end tables in the living room -- even extra seating for kids when you add a comfy pillow topper.
Warning
Use heavy work gloves when repurposing wooden crates. Old crates garnered from orchards or warehouses often have sharp nails or staples sticking out at odd and unexpected angles. They can also have rough, unfinished edges that lend themselves to splinters. Also be on the lookout for infestations of ants, termites and other pests. Inspect your crates thoroughly before bringing them into your home.
Video of the Day