Things You'll Need
Wrench
Screwdriver
Socket wrench
Piston stop tool
Rag
Metal hook
Eye protection
Replacement clutch parts

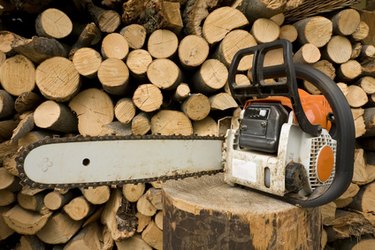
The clutch on a Stihl MS 250 chain saw uses inertia to activate the clutch drum and sprocket and drive the chain forward. These inertia-driven clutches operate only at high speeds, making them safer and more efficient cutting machines. The clutch assembly consists of washers, C-clips, a clutch drum, a sprocket or drive gear, a clutch, shoes and a spring. Inspect the clutch drum, shoes and sprocket regularly for wear and replace when necessary.
Step 1
Shut down the saw. Disengage the chain brake by pulling back on the black plastic lever on top of the saw. Unscrew the clutch cover's retaining bolts with the wrench. Release the chain's tension on the bar by loosening the bar tensioner screw. Remove the clutch cover, bar and chain.
Video of the Day
Step 2
Take out the shutter, which lifts out of engine just in front and slightly above the spark plug's rubber boot. Pull the rubber boot off the spark plug. Unscrew the spark plug with the socket wrench.
Step 3
Remove the spark plug from the engine. Insert the piston stop tool in the spark plug hole. Turn the flywheel by pulling the starter cord until you feel the piston hit the stop tool.
Step 4
Press the tip of the screwdriver underneath the C-clip on the crankshaft. Pop the C-clip off the crankshaft and remove the washer just below it. Pull off the sprocket or drive gear and the clutch drum from the crankshaft.
Step 5
Remove the needle cage from the inner ring of the sprocket. Clean the clutch drum with a rag and inspect for signs of thinning and wearing. Replace the needle cage, drive sprocket and clutch drum if they show signs of heavy wear and tear.
Step 6
Set the socket wrench in place over the bolt that holds the main clutch assembly to the crankshaft. Turn the wrench clockwise to loosen, as the clutch in the Stihl MS 250 uses a left-hand thread. Remove the bolt from the crankshaft.
Step 7
Unhook the three clutch springs by pulling them out with the metal hook. Pull the clutch shoes off of their carrier. Inspect the shoes and the springs for signs of damage or heavy wearing. Replace parts as necessary.
Step 8
Reassemble parts in reverse order. Clean the crankshaft stub before reinstalling the clutch. Set the shoes in place on their carriers. Hook the springs in place using the metal hook. Lock the clutch in place by turning the bolt counterclockwise.
Step 9
Set the clutch drum in place over the clutch. Lubricate the needle cage with engine grease and fit into the drive sprocket. Press down lightly on the clutch drum and rotate it until you can feel the oil pump drive spring engage the clutch.
Tip
If your clutch needs replacing, you should inspect your chain brake as well.
Warning
Always wear safety equipment when working around power tools.
Video of the Day