Things You'll Need
Voltage tester
Screwdrivers
GFCI receptacle
Electrical tape
Transparent tape
Piece of paper
Pair of scissors

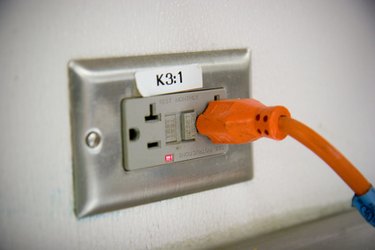
A ground fault circuit interrupter, or GFCI, outlet is designed to instantly cut off the electrical power supply in a circuit as soon as it detects any load imbalance. It is required by law to be installed in areas such as bathrooms, garages, kitchens, crawl spaces, unfinished basements and outdoor outlets in order to protect people from deadly electric shock. It is relatively easy to install a GFCI outlet, and learning to replace one can save you some cash.
Step 1
Turn off electric power to the affected circuit by locating the corresponding circuit breaker in the electrical panel and flipping the circuit breaker switch to its "Off" position. Test the GFCI receptacle using a voltage tester to be sure that there is no more power to the GFCI receptacle.
Video of the Day
Step 2
Remove the wall plate of the GFCI receptacle by unscrewing the holding screw on top of the plate using a screwdriver. Remove the screws that fasten the now exposed GFCI receptacle to the wall using a screwdriver, and then carefully pull the receptacle out of the wall. Use the voltage tester and test the receptacle again to be absolutely sure that there is no more power in the circuit.
Step 3
Look at the GFCI receptacle thoroughly and notice the way all the six wires are connected. Cut six small strips of paper about 1/2 inch wide and 1 inch long and mark the strips individually with numbers from one to six. Tape each strip in any order unto each wire. Note that black wires connect to copper terminals while white wires connect to silver terminals. Green wires connect to the ground terminal at the bottom of the receptacle. Live or hot wires that have power coming from the circuit breaker connect to the terminals marked "Line" while wires that will pass current from the receptacle to another receptacle connect to terminals marked "Load."
Step 4
Draw an illustration of the GFCI receptacle on a piece of paper and show the six wires with their corresponding wire number in your illustration. Pay particular attention to which wires go to the terminals marked "Load" and which wires go to the terminals marked "Line." This illustration will serve as your guide when you are reconnecting the wires to a new GFCI receptacle. You can also take a picture of the receptacle with your digital camera and view the picture later in order to be sure that you are reconnecting the wires in proper order.
Step 5
Disconnect the wires one by one from the receptacle by loosening the terminal screws using a screwdriver. Get a new GFCI receptacle and reconnect all six wires in the same arrangement as the previous connection. Look at the illustration you made and follow the same arrangement or connections. Hook the wires around the terminals clockwise and tighten the terminal screws. Wrap two rounds of electric tape along the side of the receptacle to cover the terminal screws.
Step 6
Push back the wires into the outlet box and reinstall the receptacle unto the box. Fasten the receptacle by screwing the holding screws with a screw driver. Replace the wall plate and fasten it unto the receptacle by screwing the retaining screws. Turn on the circuit breaker at the electric panel. Press the "Test" button in front of the GFCI receptacle, and then press "Reset" to reset the fuse. Plug an appliance into the receptacle and turn on the appliance to confirm that there is power in the receptacle.
Warning
Always consult an electrician before performing an electrical task. Do not attempt to repair an electrical problem if you do not posses the necessary training or experience. Be absolutely sure that there is no power in the circuit before performing this task.
Video of the Day