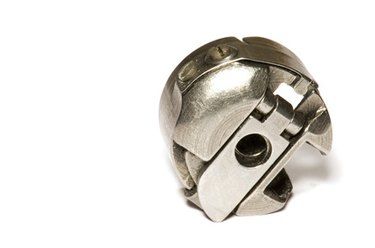
Threading the bobbin on a Viking sewing machine can vary from model to model, so you should check your sewing machine operating manual for best results. With older model Vikings, the last step of bobbin threading must be done by hand after the bobbin has been placed back into its case; but with newer electronic models, the process is complete once the bobbin is wound and replaced. Even so, regardless of the Viking sewing machine model there are two main ways to thread the bobbin, either with the needle threaded or from the side or back of the machine.

Video of the Day
Things You'll Need
Sewing Thread
Empty Bobbin
Step 1
Open the shuttle door and remove the bobbin case by pressing the latch and pulling it out. Keep the latch depressed so that the bobbin will not fall out while removing it.
Video of the Day
Step 2
Release the latch and turn the empty bobbin so that the small round dot faces outward and slide it onto the bobbin spindle. Remove the thread from the needle and run it through the thread guide at the top back of the machine down to the small discs on the side. If you would rather keep the needle threaded while winding the bobbin, raise the presser foot and place the thread under it and across the front to the bobbin area on the side.
Step 3
Wind the thread around the bobbin a few times and cut. Press the foot control to begin automatic winding. The sewing machine will stop when the bobbin is full. Remove it and cut the thread. Wind additional bobbins as needed.
Step 4
Place the bobbin in its case with the small round dot facing out. Slide the thread into the slot on the edge of the bobbin case and pull it under the tension spring. To avoid uneven tension and thread breakage, the bobbin should rotate clockwise when the thread is pulled in the direction of the spring.
Step 5
Slide the thread behind the hook at the top of the bobbin case and to the right. Insert into the sewing machine and press until it clicks in place. Cut off the thread end by pulling it over the cutter;shut the shuttle door. For older model Vikings, place the top thread under the presser foot and make one full manual turn with the flywheel pulling up the bobbin thread loop. Manually pull out about 3 to 5 inches of bobbin thread under the presser foot to begin sewing. With newer Viking sewing machines, you can start sewing after closing the shuttle door.
Tip
Clean the shuttle and bobbin area with a small brush to dislodge any lint and threads before replacing the bobbin.
Warning
Do not draw the thread directly from the needle to the bobbin winder or the needle may bend or break.