Things You'll Need
Flat-head screwdriver
Phillips-head screwdriver
Needle-nose pliers
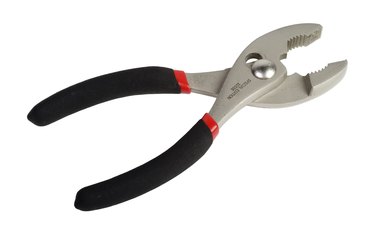
Pliers

Many Moen single-handle faucets use the 1225 cartridge to divert the water through the faucet. When you begin to have leaks through the spout when the faucet is turned off, replacement of the cartridge is necessary. The most difficult part of the Moen replacement is removing the Moen cartridge 1225. This is due to the clip that holds the cartridge as well as sediment build-up that can freeze the cartridge in place. The replacement Moen 1225 cartridge comes in a kit that includes a removal tool. The replacement cartridge is available at home improvement centers.
Step 1
Turn off the water supply to the faucet. If the faucet is a sink faucet, the shut-off valves are under the sink. If replacing tub faucet cartridge, the shut-off valves are behind the wall the faucet is on, usually with an access from the adjoining room.
Video of the Day
Step 2
Remove the handle from the faucet. Some faucet handles have a cover on top of the handle that covers the securing screw. pry the cover off with a flat-head screwdriver and remove the screw with a Phillips-head screwdriver. Lever type handle have a set screw under the curve of the handle. Remove with a Phillips-head screwdriver.
Step 3
Pull the handle away from the faucet. Depending upon the type of faucet you are working on you may have a white limit-stop or a cartridge sleeve. Pull either of these straight off the cartridge.
Step 4
Locate the clip securing the cartridge to the faucet. The clip is a C-clip that goes through the cartridge and the faucet. Pull the clip out with a pair of needle-nose pliers.
Step 5
Grab the white plastic removal tool from the new Moen cartridge 1225 package. The removal tool resembles a plastic cap with a square block on top. Place the removal tool on top of the cartridge. Grab the square block with a pair of pliers and twist left to right to loosen the cartridge. Sediment can sometimes "lock" the cartridge into the faucet.
Step 6
Disengage the removal tool from the cartridge and grab the top of the cartridge with the pliers. Pull the cartridge straight out of the faucet. Line up the "ears" on the side of the cartridge with the notches on the faucet body. Insert the new cartridge into the faucet and press down until the cartridge seats fully inside the faucet.
Step 7
Insert the C-clip through the faucet notches and into the ears of the cartridge. Place the sleeve or limit-stop over the cartridge, depending on your faucet. Place the handle over the cartridge and secure with the retaining screws. Turn on the water supply to the faucet.
Video of the Day