Things You'll Need
Measuring tape
Pencil
Paper
Picture
Scanner
Computer
Printer
Cardboard
Scissors
Plastic pan
Glue
Foam paint roller
Box cutter
Weight

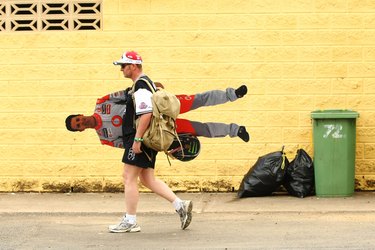
A lifesize standee can be a valuable tool for a silly prank or serve a more formal purpose. Unfortunately, premade, lifesize standees can be costly. Don't worry, however, because you can make your own lifesize standee at home for a fraction of the cost. If you have fun building the first standee, you can make it a craft project for your whole family.
Step 1
Measure the height and the width of your standee model. For the width, measure the model at the widest part of his body. Record the measurements for later use.
Video of the Day
Step 2
Select a picture you will use for the standee. It should show the entire frame of the person you will use as the model, from the feet to the top of the head. Scan the picture onto your computer so you can edit it.
Step 3
Crop the sides of the image at the widest part of the model's body (shoulders, stomach, hips or feet) with photo editing software. Crop anything below the feet and above the head. This negates the need for extra pieces of printed-paper that do not have the model in them. Save the edited photo.
Step 4
Right-click the image file and select the "Print" option. Resize the the photo using the "Poster" option to the correct measurements of your model. For example, if your model is 5 feet and 6 inches tall, make that the length of the photo and adjust the width of the photo to match your model's width, as well. Insert the desired height and width of the standee to get the appropriate lifesize image.
Step 5
Piece together the different pieces of paper over a large cardboard panel. The cardboard panel will be the backing of the standee, so it must be large enough to accommodate the entire picture of the model. Cut off any white boarders on the pieces of paper so that each page fits together seamlessly.
Step 6
Fill a flat plastic pan with craft glue, just enough to coat the bottom of the pan. Coat a foam paint roller with the glue. Flip over one of the pages you will use for the standee and coat the back of it with the foam roller. Flip the paper over so that it is facing upward again and carefully set it into place on the cardboard.
Step 7
Flip over the remaining pieces of paper and coat them all, one-by-one, with glue. Turn them over immediately after you coat them with glue and place them in position so they can fuse to the cardboard.
Step 8
Cut around the figure of your model once the glue dries on all the pieces of paper. Use a box cutter to cut through the sheets of paper as well as the cardboard underneath. Leave a little bit of space between the outline of the standee and your cut so that you do not accidentally crop off any part of the standee.
Step 9
Glue a cardboard box behind the standee. Open the top of the cardboard box and set a weight inside to keep the standee erect.
Tip
Remove any excess glue as you place each sheet of paper. Leaving excess glue to dry can cause your sheets to line up improperly. Use a high-resolution image to ensure the best possible appearance of your standee.
Video of the Day