Things You'll Need
Measuring tape
Pipe cutter
Drill
Plastic anchor
Hammer
Caulk
Sweating compound
Copper coupling
Torch
Flux

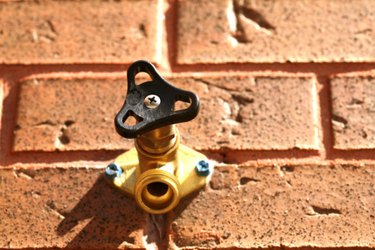
If you are an avid gardener an outdoor spigot is a time-saving must. An outdoor spigot gives you an easily accessible source of water for your watering can or simple irrigation system. Installing a new spigot gives you the option to choose new frost-proof, anti-siphon spigots. Installing a frost-proof, anti-siphon spigot prevents the danger of frozen lines during the winter which can burst and cause extensive damage to the foundation of your home. Only attempt to install a spigot if you have basic plumbing skills.
Step 1
Call your local plumbing inspector to check on requirements for upgrading your outside water spigot. You may need a permit to install. Regulations will also dictate what kind of pipe standard you need to use, such as a 3/4-inch minimum supply pipe to the sill cock.
Video of the Day
Step 2
Measure the diameter of the existing pipe using a tape measure. Make a measurement of the thickness of the wall. Purchase your new spigot with the frost-proof sillcock and measure the length of the pipe extending from the spigot. Also note whether it has a threaded male or female end.
Step 3
Turn off the water inside at the main control valve. Open the spigot outside to release any water from the pipes.
Step 4
Cut the old pipe from your plumbing inside using a copper pipe cutter to the length required for the new spigot. Remove the old spigot from the wall outside.
Step 5
Set the new spigot in the old hole and mark the area for the screws to secure the spigot using a pencil. Drill holes into the wall for the screws. Hammer in plastic anchors for the new screws.
Step 6
Place a bead of caulk around the flange of the spigot to seal the space between the spigot and the wall. Place the spigot into the wall and secure it in place with a stainless steel screw into the plastic anchor.
Step 7
Remove the sillcock from the stem using an adjustable wrench from the inside. This prevents melting the washer when welding inside.
Step 8
Stick a piece of pipe inside the portion of the spigot exposed inside the home after brushing it with sweating compound. Connect that piece to a portion of copper coupling to the exposed portion of copper pipe you cut before.
Step 9
Light your torch and apply the heat to the spigot part inside the home. Apply heat till the sweating compound bubbles. Apply flux to the copper coupling by placing heat on the coupling and applying the flux on the opposite end as the copper heats. Allow the pipes to harden for a few hours before turning on the water.
Video of the Day