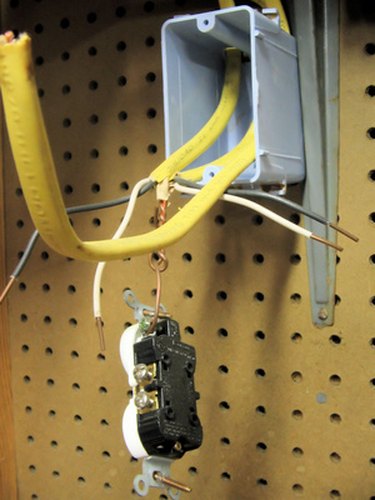
Things You'll Need
ROMEX® wire
Cable staple gun and staples
Wire strippers
Drill and bit
Screwdriver
Pocketknife

ROMEX® is a trademarked brand name of electric wiring. ROMEX® has a plastic coating to protect the wires inside and make it easier to feed through the walls. It is lighter and more flexible than metallic-sheathed wiring, making it easier for non-skilled professionals to use.
Inside the plastic coating are three wires — one is a bare copper (ground) and two are coated wires, one black and the other white. It comes in sizes ranging from 2/3 to 14/2. Get the right gauge of wire for the job.
Video of the Day
Step 1
Drill a hole, approximately 1/4 inch larger than the wire in every wall stud from the plug box you are wiring to the fuse box or second plug box you are connecting to. The holes should be in a straight line at least 1.25 inches back from the side where the finished wall will be.
Step 2
Starting from the plug, feed the wire through the holes until you get to the next box. Allow an extra 6 inches at each end to work with and cut the wire to length using your pocketknife.
Step 3
Using your pocketknife, carefully make a cut in the coating at the end of the ROMEX® wire about an inch long. Peel the coating back 6 inches to reveal the wires inside. Cut the peeled coating off. Remove 3/4 inch of coating from the end of the black and white wire using wire strippers. Twist the bare wire between your thumb and forefinger to keep the wire strands together. Repeat the process for the other end of the wire.
Step 4
Feed the wires into the box where you wish to connect your plug or switch until the plastic coating of the ROMEX® goes in the wire clamp on the box. Using your screwdriver, tighten the clamp connected to the hole you fed the wire through until the wires are snug. Attach the ROMEX® to the wall stud with cable staples 1.25 inches back from the front of the stud where the wall will be. Staple the ROMEX® in place all the way up to the hole in the stud where the wire goes through. Do the same for the box at the other end.
Step 5
Make your connections to the plug or switch using the wiring code in your local area and screw it in place in the box. Screw the appropriate cover such as a switch box faceplate for a switch to the box. Connect the other end to the fuse box following local wiring codes. Repeat Steps 1-5 to wire the rest of the house in this manner. If you are running a wire from one plug box to another, connect up both wires in the box before fitting the plug and cover on.
Step 6
If you are working from a finished wall feed the ROMEX® down behind the drywall to the floor. Using your screwdriver, gently pry out the baseboard and with your pocketknife and cut a small hole where the baseboard was to feed the wire through. Do the same thing in reverse going up the wall to the box feeding the wire through. (The wire is stiff, so it will travel up the wall. Unscrew the box on the wall and slide it out to grab the cable).
Remove all the baseboards along the path to where you want to connect the wire too. Staple the wire to the wall where it touches the floor, making sure the wire stays straight. Carefully replace the baseboards with nails in the top of the baseboard as far away from the wire as possible. Make your connections at the boxes as outlined in the previous steps. This takes more care than with unfinished walls but it makes less mess with a lot less patching of the walls.
Tip
Measure carefully before cutting the wire to length.
Turn the power off at the fuse box before connecting to it in order to avoid shocks.
Use the right type of wire.
Warning
Do not splice two wires together. If the ROMEX® is too short cut another piece and start again.
Do not place wires where someone can hammer a nail into it through the wall.
Do not run ROMEX® wire through liquids or through moving parts to avoid shorting out the wire.
Video of the Day