Things You'll Need
1 piece V-shaped trim, 96 inches
Miter saw
Tape measure
1 piece poplar, 3 by 96 by 3/4 inches

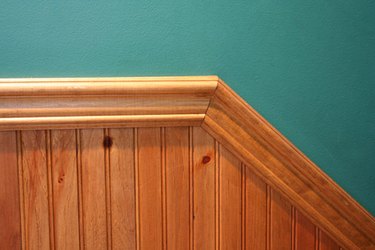
Cutting an angle on V-shaped trim results in a compound miter. The tilt of the angle can be hard to understand because the trim cannot lie flat on the saw. When it does lie flat, it positions the cutting angle in the wrong configuration. To remedy this, you need to simulate the position that the trim will be in when it is installed before cutting it. V-shaped trim needs to be tipped up off the table when cutting angles. By making a backer out of poplar, V-shaped trim can be cut accurately.
Step 1
Set the miter saw at 90 degrees and cut the piece of trim in half. Swivel the miter saw to 45 degrees and cut a left-hand miter joint on the left-side piece of trim. Swivel the saw to the right and cut a right-hand miter on the right-side piece of trim.
Video of the Day
Step 2
Lay both pieces of trim out on a flat surface. Bring the miters together in the position that you want them to be joined. Tilt both pieces of the trim until the mitered angles come together tightly.
Step 3
Put aside one piece of the trim, but continue holding the other piece in place as if it were still joined to the first piece. Use a tape measure to measure the distance from the top of the table to the bottom edge of the trim that you are holding up. Write down the measurement, which should be between 1/4 and 3/4 inch.
Step 4
Set the table saw at the measurement and cut a 96-inch strip of poplar to the measurement.
Step 5
Lay the strip of poplar on the miter saw table. Place the trim on the miter saw table with the bottom edge of the trim resting on the poplar. The trim should be at a slight angle, tilted away from you. Hold the trim tight against the fence and the top of the saw with one hand. Turn on the saw and cut the trim with the other hand. Reverse the blade and cut the opposite angle on the opposing piece of trim in the same manner.
Tip
Keep your trim pieces longer than needed so that you can make test cuts. Tilt the trim up or down to alter the angle until you get tight joints. Test fit the miter angle on the project where it is going to be installed. It may take several attempts before you get the angle perfect. If you can't get the angle to come together, turn the pieces of trim upside down, reverse them right and left and try tilting and matching the angles again.
Warning
Always wear safety glasses when working with wood.
Video of the Day