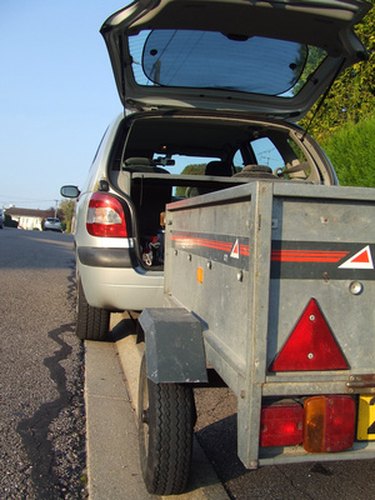
Things You'll Need
4 pieces 18-inch by 96-inch plywood, 3/4-inch thick
Circular saw
1 piece 2-inch by 2-inch by-96-inch lumber
Electric miter saw
Variable speed drill
3/16-inch drill bit
Philips head screw tip
2-inch drywall screws
2 pieces 48-inch by 96-inch plywood, 3/4-inch thick
3/16-by-3-inch bolts with washers and neoprene nuts
Socket and ratchet
Heavy-duty hinges
Lockable latch with screws

This do-it-yourself project is for those who need to carry items when they travel. Build your box trailer with treated plywood or high-quality untreated plywood that can be sealed or painted. Use a solid lumber frame to add strength to the trailer and to help keep it steady while you pull it. Remember to check the weight capacity of your trailer frame before starting the project.
Step 1
Cut the sides, front and back of the trailer. Measure the length of the trailer frame and subtract 1 1/2 inches. Mark the plywood with the measurement and, using the circular saw, cut two identical pieces to use as the sides. Measure the width of the trailer frame and cut two identical pieces to use as the front and back of the box.
Video of the Day
Step 2
Measure and cut the box frame from the 2-by-2s. Using the electric miter box, cut four pieces from the 2-by-2-by-96-inch lumber the same length as the sides. Subtract 3 inches from the length of the front and back pieces and cut four pieces to that length. Cut pieces that will act as studs 15 inches in length. Cut one stud for each end of the plywood pieces and then as many as you need to keep the space between them 12 inches.
Step 3
Drill pilot holes in the frames. Place the 2-by-2s on a worktable. Drill 3/16-inch pilot holes through them. Drill one hole 1-inch from the ends of the frame pieces and space the others about 4 inches apart.
Step 4
Attach the frames to the sides. Place the two pieces of plywood cut for the sides on the worktable. Hold the long sides of the frames even with the long sides of the plywood and secure them through the pilot holes with the drywall screws. Secure the studs between them in the same manner.
Step 5
Secure the frames to the front and back of the box. Lay the front and back of the box on the worktable. Make a mark at 1 1/2 inches from the 18-inch sides of the front and back. Place the framing square on the marks and draw lines parallel with the 18-inch sides. Secure the frame pieces between the lines with drywall screws.
Step 6
Assemble the pieces. Stand the plywood pieces on their long edges. Secure the sides between the front and back with the drywall screws. Measure the width and length of the box and, using the circular saw, cut two pieces of plywood to those measurements to use as the top and bottom of the box. Apply glue to the edges of the box facing up, including the frame, and secure one of these pieces to the box with the drywall screws.
Step 7
Install the box on the trailer. Measure the spaces between the screw holes in the trailer frame and transfer the measurements to the bottom of the box. Drill 3/16-inch pilot holes for the bolts that hold the box to the trailer. Get some help to set the box on the trailer and secure it with the bolts, washers and nuts. Place the remaining piece of plywood on the top of the box. Secure the hinges on one end and the latch on the other.
Tip
Seal the box inside with silicone caulk to help keep water out.
Apply a finish to the box before using it.
Install rubber strips between the top and the box to seal it, if desired.
Warning
Do not leave power tools within the reach of small children.
Video of the Day