Things You'll Need
N95 respirator
Goggles
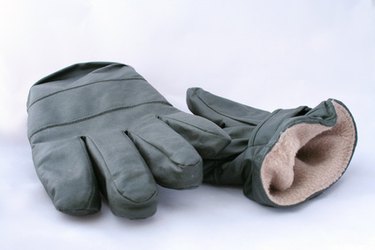
Heavy-duty gloves
Hard hat
Work boots
Long-sleeve shirt
Long work pants or jeans
Utility knife
Pry bar
Hammer
Trash bags

Whether your mobile home was damaged by a disaster, an accident or simply the passage of time, you may have decided it would be more cost-efficient to gut it rather than make repairs. Gutting a mobile home is the first step to returning it to its original condition, preparing it to be sold or remodeled. Your first concern when gutting any structure is safety. Make sure you and your helpers are wearing and using the correct equipment, and are aware of each other's presence in the home when removing walls, furniture, carpeting, miscellaneous items and debris.
Step 1
Put on your long shirt, long pants, respirator, goggles, gloves, hard hat and boots. Make sure each worker is wearing this uniform to protect him from inhaling harmful chemicals and debris.
Video of the Day
Step 2
First remove all large objects from the home , such as couches, chairs, televisions, shelves, kitchenware and other items. Store these items for later use, throw them in the trash or donate them.
Step 3
Walk through the home with trash bags and throw out useless items and accumulated waste. To make this process more time efficient, have three to five workers remove furniture while another three to five collect and throw out trash.
Step 4
Remove the carpet or other flooring. For carpet, grab it from a corner and pull it back from the tack strip. Cut long, straight strips with your utility knife and roll them up for orderliness. Continue cutting and rolling until all carpet is removed.
Step 5
Pry the tack strip from the floor with a crowbar. Wedge the crowbar in between the tack strip and the floor until they separate, and then pull the tack strip off. You may need to remove nails from the tack strip with a hammer.
Step 6
Remove the paneling or drywall. For drywall, remove the baseboard and trim around the wall first. Insert your pry bar in between the drywall and the trim and pull toward yourself. The trim will come loose and can be removed. Repeat this process to loosen the nails holding the drywall in. Once the nails are removed, hit the back side of the drywall lightly with a hammer until pieces become loose. Repeat this process until all nails and drywall are removed. For paneling, remove the base, trim and crown molding in the same fashion. Remove all nails or screws from the paneling with a screwdriver and a hammer. Cautiously hit the paneling from top to bottom with your hammer until it becomes loose. Detach paneling with your crowbar.
Step 7
Clean up nails, paneling and drywall debris as you remove the walls. While a team of three to five removes the walls, another team of three to five should be cleaning up after it for safety.
Step 8
Take your trash materials to an appropriate dump site.
Video of the Day