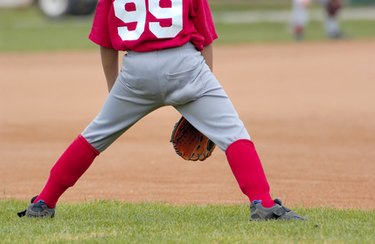
Baseball pants traditionally do not reach a person's ankle but instead stop anywhere from the knee to just above the ankle. For a more tailored fit, it is possible to hem the pants and re-install an elastic band so that the pants reach the desired length.
Things You'll Need
Baseball pants
Measuring tape
All-purpose thread
Elastic banding
Needle
Sewing machine OR iron-on hem tape
Sewing scissors
Pins
Iron
Safety pins
Video of the Day
Cut Pants to Desire Length
Step 1
First, you must measure the desired length of the pants. The easiest way to do this is to have the player wear the pants and measure from the waistband of the pants to where you want the pants to end. Do this once on the outside and on the inside parts of the leg where the pant has seams. Then, to make pants without a bubble, add one inch to the length and mark the new length with safety pins. If you want a little bit of a bubble at the end, add two to three inches to the length and the mark the new length with safety pins.
Video of the Day
Step 2
While the player is still available measure the circumference of their leg where the pants should sit. Note that this is not where you just placed the safety pins but is where you want the elastic band on the finished pants to sit. It should be either one inch above the safety pins for pants that lie flat or two to three inches above the safety pins for pants with a bit of a bubble. Mark this measurement down on a piece of paper for later.
Step 3
Once the pants have been marked, the player can take them off for the rest of the hemming process. Using a measuring tape as a straight line guide and either pins or safety pins, mark a straight line between the safety pins all around the leg so that you have an accurate visual marker of where to cut the pants. Then cut the pants as close to the pins as possible without cutting above them.
Step 4
Once the pants have been cut to the desired length, remove the pins. Fold the new edge of the pants up to the inside of the pants so that one inch of fabric is folded up. Pin the fabric. Ironing the fabric at this point is also beneficial.
Sewing the Pants
Step 1
Using a straight stitch, sew around the circumference of the new pant hem 3/4 of an inch above the folded edge. This should leave you with 1/4 of an inch of fabric above the seam on the inside of the fabric. Leave a one inch opening between the beginning and the end of the seam. Repeat on other leg. Alternately, you could use iron-on tape, but make sure to leave at least 1/2 inch of space between where the pants fold and where the tape begins in which to thread your elastic.
Step 2
Using the measurement you took previously of the leg circumference at the hem, subtract an inch and cut two pieces of elastic to that length. Use elastic banding that lies flat, a 3/8 inch or 1/2 inch width would work well.
Step 3
Thread the elastic through the pant's hem. Use a safety pin to attach one end of the elastic banding outside of the seam. Then put another safety pin onto the other end of the elastic banding to help with threading.
Step 4
Once the elastic is through the entire hem, pin the edges together, one lying on top of the other so that there is a half inch overlap on either side. Sew a zig-zag stitch several times over the intersection of the two pieces. Repeat for other side.
Step 5
Lastly, either sew the one inch opening closed by hand or iron it shut with hem tape. Double check that the pants fit to the desired length, and that's it.
Tip
Always measure twice and cut once. If you're unsure, cut longer than you think you need to because you can always re-hem a piece of clothing to make it shorter but you can't make it longer once you've cut it.
Also be sure that the elastic in the band lies completely flat before you sew the edges of the elastic together.
You can use either coordinating or contrasting thread for this project.
Warning
Please observe all cautionary measures when using sewing machines and irons.