Things You'll Need
Sewing needle
Syringe
Cold water
Oven
Cookie sheet
Beeswax
Microwave
Stove
Sauce pan
Spoon
Egg carton

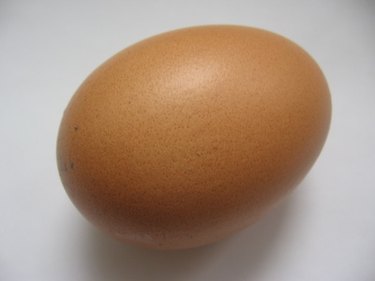
Working with eggshells and preserving them requires emptying the contents without damaging the shell itself. The eggshells require cleaning and treating with heat to prevent rot or decay. Besides strengthening and preserving the outer shell and cleaning the inner shell out, filling the interior again with another substance makes the eggshell less fragile and easier to manipulate without cracking.
Step 1
Poke a small hole into the center of the large bottom part of an egg with a sewing needle. Insert the needle a few times to enlarge the hole to about half the diameter of a pencil eraser.
Video of the Day
Step 2
Fill a syringe with air by pulling the plunger back slowly. Insert the syringe needle into the hole in the bottom of the egg. Push the plunger into the syringe to force air into the shell and the egg's content out of the hole and into a bowl.
Step 3
Remove the syringe needle and pull back on the plunger again to refill it with air. Place the needle back into the egg and continue to push the contents out until nothing is left to come out of the egg.
Step 4
Fill the syringe with cold water and insert the syringe back into the shell again to fill it completely with the water. Cover the egg hole with your finger and gently shake the egg to help dislodge any remaining egg content. Force the water back out of the egg with the syringe air just as done before. Repeat this step an additional two times.
Step 5
Heat an oven to 200 degrees Fahrenheit and place the egg, lying on a cookie sheet, in the oven for 15 minutes. This will dry out the inside of the egg completely, and help harden it slightly. Remove the shell and let it cool for about 10 minutes before touching it.
Step 6
Melt one cup of beeswax in a microwave or saucepan on a medium high heat. Allow the beeswax to liquefy slowly, but not come to a boil, by stirring it occasionally. Adjust the heat as necessary or remove the wax from heat to control the melting speed.
Step 7
Dip the syringe needle into the warm wax and pull back on the plunger. Fill the inside of the egg with the beeswax. Fill the syringe as many times as necessary to get the entire egg full.
Step 8
Place the egg, hole side up, in an empty egg carton and let it cool completely. Within four hours the wax will harden enough to move the egg.
Tip
Do multiple eggs at the same time and do all the eggs for each step before moving on to the next.
Warning
Do not place the wax-filled egg into the refrigerator to cool. Let it cool in the open air only.
Video of the Day