Things You'll Need
Plate steel
3-ton cylinder jack
1.75-inch metal tubing
Angle iron
Steel bar
Arc welder
Bandsaw
Drill press
Filter
Plastic jug
Carbide blade
6-inch diameter Metal canister
1-inch screws
Wooden board 24 inches wide and 24 inches long
Paint
File
Grinder

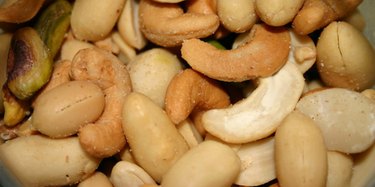
Oils extracted from nuts, such as peanut oil, can be used in the same way as other vegetable oils for frying and as a baking ingredient. Although nut oils are available in stores, processed and packaged products usually include a number of added ingredients. To cook with pure nut oil, it is possible to press your own at home. Oil presses can squeeze the oil from ground nuts or ground seeds. Building such a press requires some welding ability and a significant investment of time.
Step 1
Purchase a standard cylindrical 3-ton hydraulic jack from an auto-parts store. This has a handle that is pumped by hand to raise a central cylinder with up to 3 tons of force; this force will squeeze the oil from the ground nuts.
Video of the Day
Step 2
Mount a carbide blade onto a bandsaw or circular saw and use it to cut two 24.5-inch lengths and one 6.5-inch length of 1.75-inch diameter steel tubing. The carbide blade is the only type that will not dull while cutting the metal of the tube.
Step 3
Cut a 5.5-inch piece of steel bar and two 8-inch lengths of angle iron (which has two faces at a 90-degree angle), again using a carbide-blade saw.
Step 4
Use an arc welder to weld all the metal pieces into a rectangular frame. Stand the two long metal tubes on their ends 5.5 inches apart, with the shorter metal tube on its end midway between them. Weld the piece of metal bar across the top of the two long tubes, and the two pieces of angle iron on either side of the bottom of the three tubes together.
Step 5
Use a file and a grinder to remove any rough surfaces from the cuts and welds, then paint the whole thing to seal in any metal shavings and dust that might get into the oil being pressed. Once the paint dries, attach the whole frame to a piece of wood by drilling holes into the angle iron and passing screws through them into the wood.
Step 6
Weld one end of a steel canister shut with a metal disk cut from your piece of plate steel, then drill 15 to 20 holes distributed around the canister's sides toward the closed end. This will be the pressing cylinder, with the holes allowing the oil to escape.
Step 7
Build the piston that fits into the press cylinder by welding a metal disk to the end of a short length of pipe. The pipe should be just large enough to fit over the small pipe in the middle of your frame, while the disk should be cut to fit snugly inside the press canister.
Step 8
Slice off the bottom 1.5 inches of a round plastic jug and cut a hole in the center big enough for the small pipe at the center of the frame. Slide this piece over the small pipe, where it will serve as a collection tray for the oil dripping from the canister.
Step 9
Set the piston disk on top of the small middle pipe. Pile up ground nuts on top of it, then cover the pile with the press canister.
Step 10
Fit the 3-ton jack in between the top of the canister and the top of the frame, with the jack piston centered on the top of the canister. Pump the jack using the attached handle. As the piston presses the canister down onto the ground nuts, it will squeeze out the oil, which will escape from the holes in the sides of the canister and drip into the collection tray at the bottom.
Video of the Day