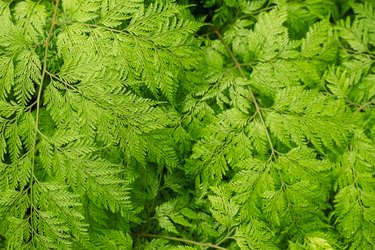
With furry brown rhizomes peeking out from under airy foliage, the rabbit's foot fern (Davallia fejeensis) looks as if it does, indeed, crouch over a bunny's paws. Native to Fiji, it can produce fronds as long as 3 feet under optimum conditions. Often potted in hanging baskets where its furry legs clamber over the sides, the fern is hardy in U.S. Department of Agriculture plant hardiness zones 10 through 12 but is most often grown as a houseplant. Propagate Davallia species with pieces of rhizome, through division or by planting spores.
Propagating Rabbit Foot Fern
Video of the Day
The easiest way to propagate the rabbit's foot fern is simply to snip off 2- to 3-inch pieces of its rhizomes or "feet." If you prefer to start an entirely new plant, cut sections that contain no foliage. To give the plant a head start, harvest those which already have fronds attached.
Video of the Day
In either case, fill a new pot – preferably a shallow one, such as an azalea pot, which contains drainage holes -- with 1 part potting soil and 1 part peat moss or the University of Georgia's recommended mix for rabbit's foot fern. It includes 1 part potting soil, 1 part peat moss, 1 part fine pine bark and 1 part sand, with 1/2 cup charcoal chips added to each 1 quart of the mix.
Place the rhizome pieces horizontally across the surface of that mix, with any fronds they may possess pointing up. Press the pieces only lightly into the mix so their upper half remains above it, and pin them in place with old-fashioned hairpins, garden staples or pieces of bent wire. Water the mix well and place the pot on a north-facing windowsill, where it receives bright light but no direct sun, or under the end of a fluorescent grow light. If their mix is kept damp, the rhizomes should shortly form new roots.
Propagation by Division
If an old fern has become severely pot bound, divide it into several new ferns, advises Missouri Botanical Garden. To do so, water the plant well first. Remove it from its pot and cut its root ball into two to four sections with a long-bladed knife, disentangling the rhizomes at the surface as you work so some are included with each section. Pot up each piece in its own new container, making sure the rhizomes rest on top of the soil rather than being covered by it.
Propagation by Spores Part 1
Propagating rabbit foot fern can also be done by spores. In late summer or early fall, cut a frond from a rabbit's foot fern and place it between two pieces of white paper in a location protected from drafts. After two weeks, remove the wilted frond and check the paper beneath it for signs of a reddish dust-like substance, the fern's spores.
Grow those spores in a microwave-safe lidded clear plastic container with drainage holes, such as those in which berries are sold. Fill that container with damp potting soil and microwave the soil for three to five minutes until it steams. This will not smell pleasant, so keep a window open to air out the room.
After allowing the soil to cool, crease the white paper that holds the spores. Holding that paper tilted over the container, tap it lightly to disperse the spores evenly over the surface of the soil.
Propagation by Spores Part 2
Close the lid on the container, and place it on a north-facing windowsill, making sure its soil remains damp. In six to eight weeks, small green scales should appear. When they measure about 3/8 of an inch in diameter, mist them with water from a spray bottle to ensure their fertilization. In another six to eight weeks, tiny fronds – only about 1/2 inch tall – will sprout. At that point, you can transplant the little ferns to stand 3 inches apart.
Keep the container covered until spring, gradually opening it for longer and longer periods of time over the course of about two weeks until it is open all the time. Once the ferns have adjusted to the lower humidity levels, transplant them into individual pots.