Once a car alternator fails, the battery will soon follow. You might choose at this point to replace the entire unit. But if you are interested in saving some money or helping the environment by reusing the old alternator, remove the unit, disassemble and inspect it, replace any worn parts and put it back together. This requires a good deal of mechanical expertise. Do not attempt to disassemble an alternator without the proper knowledge and training. You may test the rotor once you've taken apart the alternator.
Step 1

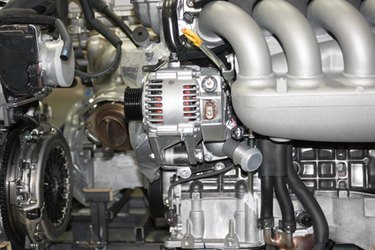
Remove and disassemble the alternator as indicated in your vehicle's maintenance manual. Every car is different, but most alternators consist of an external housing, stator, rotor, bearing, slip ring, voltage regulator and rectifier. A cooling fan may also be attached to the pulley.
Step 2
Visually inspect rotor shaft, slip rings and windings. Look for electrical shorts that appear as burnt black streaks on the windings. Scored rings or a bent rotor shaft indicates that the rotor needs to be replaced. No further testing is necessary.
Step 3
Connect one probe of the ohmmeter to a slip ring and the other to the shaft. The resistance should be infinite; a low reading indicates that the rotor may be grounding out and needs to be replaced.
Step 4
Connect both the probes of the ohmmeter to the slip rings to test for shorts or open circuits. If the reading is below the specified resistance shown in the manual (usually between 2 to 4 ohms), there is a short. A reading above the resistance indicates an open circuit.
Step 5
Replace your rotor if it fails any of the above tests. If not, then it appears to be in good shape. Rebuild the alternator, and test the other elements of the electrical system prior to putting the vehicle back in service.
Tip
Clean all electrical contacts before reassembly. Mark the housing during disassembly so you can put it back together correctly. A small plastic dish helps keep track of little parts that you do not want to lose.
Warning
Soaking electrical components in alcohol will destroy them. Never operate an alternator on an open circuit. It may damage the diodes, and you'll run the risk of electrical shock.