Things You'll Need
Medium-grit sandpaper
Spackling compound
Large sponge
Bucket of warm, soapy water
Measuring tape
Scissors
Plastic drop cloths
Plastic sandwich bags
Small garden stones
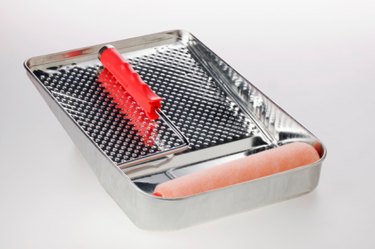
Paint roller tray
Wallpaper paster
Paint roller, 3/8-inch or 1/2-inch nap
4-foot level
Pencil
Utility knife
Seam roller
Sponge

Most wallpapers are prepasted, which can save you considerable time, and also cuts down on a lot of the mess involved in the installation process. Sometimes, though, prepasted paper isn't an option, which is the case with some handmade, vintage and specialty papers. Remember to hang the wallpaper last, after you've installed all your room's architectural details such as moldings and casings, as well as after you've painted any areas of the room.
Step 1
Prepare your walls by lightly sanding them, and fill any holes or cracks with spackling compound. Wash your walls with a large sponge soaked in warm water and detergent. Allow the walls to dry before you proceed.
Video of the Day
Step 2
Measure the height of your walls from your baseboards to the crown molding or the ceiling. Repeat this measurement in several places around the room to check for inconsistencies in wall height. Once you have a clear idea of the wall's height, note this measurement and add 4 inches to the total.
Step 3
Cut a length of wallpaper to match your final total. Cut additional lengths of paper to this same measurement, after first placing it against the prior piece to match up the pattern.
Step 4
Clear the room of furniture, and lay out your drop cloths on the floor. Smooth the drop cloths so they lie perfectly flat. Lay out one of your cut lengths of wallpaper over the plastic drop cloth. The wallpaper's patterned or colored side should be facing the drop cloth.
Step 5
Insert a few garden stones in each plastic bag and close the plastic bags' zip tops. Place each bag at the wallpaper's four corners to hold them flat while you work.
Step 6
Pour your wallpaper paste into the paint tray, and then apply the paste to the back of your wallpaper as you would apply paint. Use even strokes, and be sure to completely cover the back of the paper; use as little paste as possible while getting full coverage over the entire back for the best results.
Step 7
Remove the plastic bags and apply paste to the corners that you'd covered. Next, fold the wallpaper's pasted back against itself. Make sure all the edges match exactly, and that all the pasted areas are touching other pasted areas. Do not depress the fold itself, as you don't want to create a visible crease. This process is called "booking," and it relieves the paper's stiffness. Give this process a minute or two.
Step 8
Place your level against the wall and make a level vertical line. Extend this line from the ceiling to the floor, using your level to keep the line straight and perfectly even. Put this line in a less noticeable area of the room. Since the patterns from the first and last piece of hung paper may not exactly match, you'll want that section to be in a less seen area.
Step 9
Unfold your booked paper and align one of its long edges with the line you drew. Pull the paper up to the ceiling or crown molding and allow the top edge to extend 2 inches past the ceiling or molding. Smooth and depress the center of the paper against the wall, working your way toward the edges. Use a seam roller to smooth out any air pockets as you see them.
Step 10
Trim away the excess 2 inches at the top and the bottom of the paper with your utility knife. Regularly sponge the paper with a damp, clean sponge to control oozing glue. Repeat the process until you cover the room with paper.
Video of the Day