Things You'll Need
Mosquito net
Bamboo hoop
Needle
Thread
Pins
Scissors
Ceiling hook

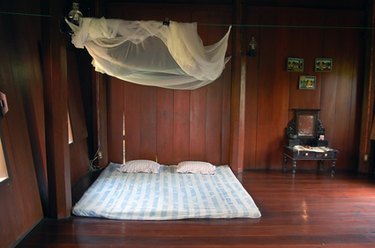
Bed canopies are as romantic as they are fashionable. They add elegance and uniqueness to any bedroom. Making a mosquito net bed canopy yourself is easy and you can make it as long and wide as you would like. Mosquito bed canopies can also be functional at keeping out pests such as mosquitoes and other bugs.
Step 1
Decide what kind of mosquito net canopy you would like: a decorative mosquito net or a functional one. If you would like a functional one to keep bugs and mosquito's out, then you want to keep that in mind while making your mosquito net by making as few holes and openings as possible.
Video of the Day
Step 2
Measure to see how long you would like your mosquito net canopy to be. This is easily accomplished with a tape measure; however you can also use other measure devices, such as a yard stick. Decide whether or not you would like your canopy to go all the way to the floor, or only past the top of the bed. Whatever your preference, measure from ceiling to preferred length and write the measurements down on a piece of paper.
Step 3
Cut the mosquito net at your preferred length. Make sure to leave about 2 or 3 inches to hem the top and bottom of your net. Set aside extra netting for the top of your mosquito net if you would like a completely enclosed canopy.
Step 4
Using a bamboo hoop of your choice, bunch the top of the mosquito net around the hoop. This should give you a good idea if the net is too wide or not. If you would like a decorative mosquito net canopy, you want it to lie gracefully in folds when it is hung up, but not in so many folds that it is impossible to move it aside to get to the bed. Cut away any excess material if needed. If you are making a functional canopy, you want fewer folds but you want to make sure that the canopy will completely surround your bed.
Step 5
Pin and sew using your needle and desired color of thread on the bottom and sides of your net. Sewing machines are an option if you prefer speed, just don't get in a hurry and make your hem uneven. If you are making a functional net, you may decide to sew together the sides of the canopy, leaving a small slit so you can climb in and out of your bed. If you would like to avoid leaving a slit in your canopy to keep mosquitoes out, you can sew the entire sides of the canopy together and get to your bed by going under the canopy.
Step 6
Using the bamboo hoop, draw the top edge of the top of your net over the hoop and pin. If the hoop opens, you may pin and sew the top hem that will go over the bamboo hoop. After you pin the net around the entire hoop, sew the net closed.
Step 7
Take the extra material that you set aside for the top of your canopy if you wanted an enclosed canopy. Measure and cut the material so that it creates a circle that will cover the hole in the top of your canopy. Sew the circle to the top of your canopy, enclosing it, and cut away any extra material.
Step 8
Cut four or so little holes in the netting right below the bamboo for hanging material. You will need to make a hole also in the top of your canopy if you went with an enclosed canopy. Using desired material, such as extra netting or attractive yarn, slip through your hole and tie around the bamboo. If you want to avoid cutting holes in your canopy, you can sew the material to your canopy. Once you have your four, or more if desired, hanging materials tied to the bamboo, tie at the top to where all of the hanging materials will be at equal length when suspended.
Step 9
Place a ceiling hook at the desired spot above your bed, such as centered over the headboard or mattress, and hang your newly made bed canopy. If you would like your canopy to be held more securely, you can use more hooks. Lay the netting material as you would like around your bed, fluffing it to add flow and the desired folds.
Video of the Day